Add Content
Add Charts, Notes, or Tables From a Session
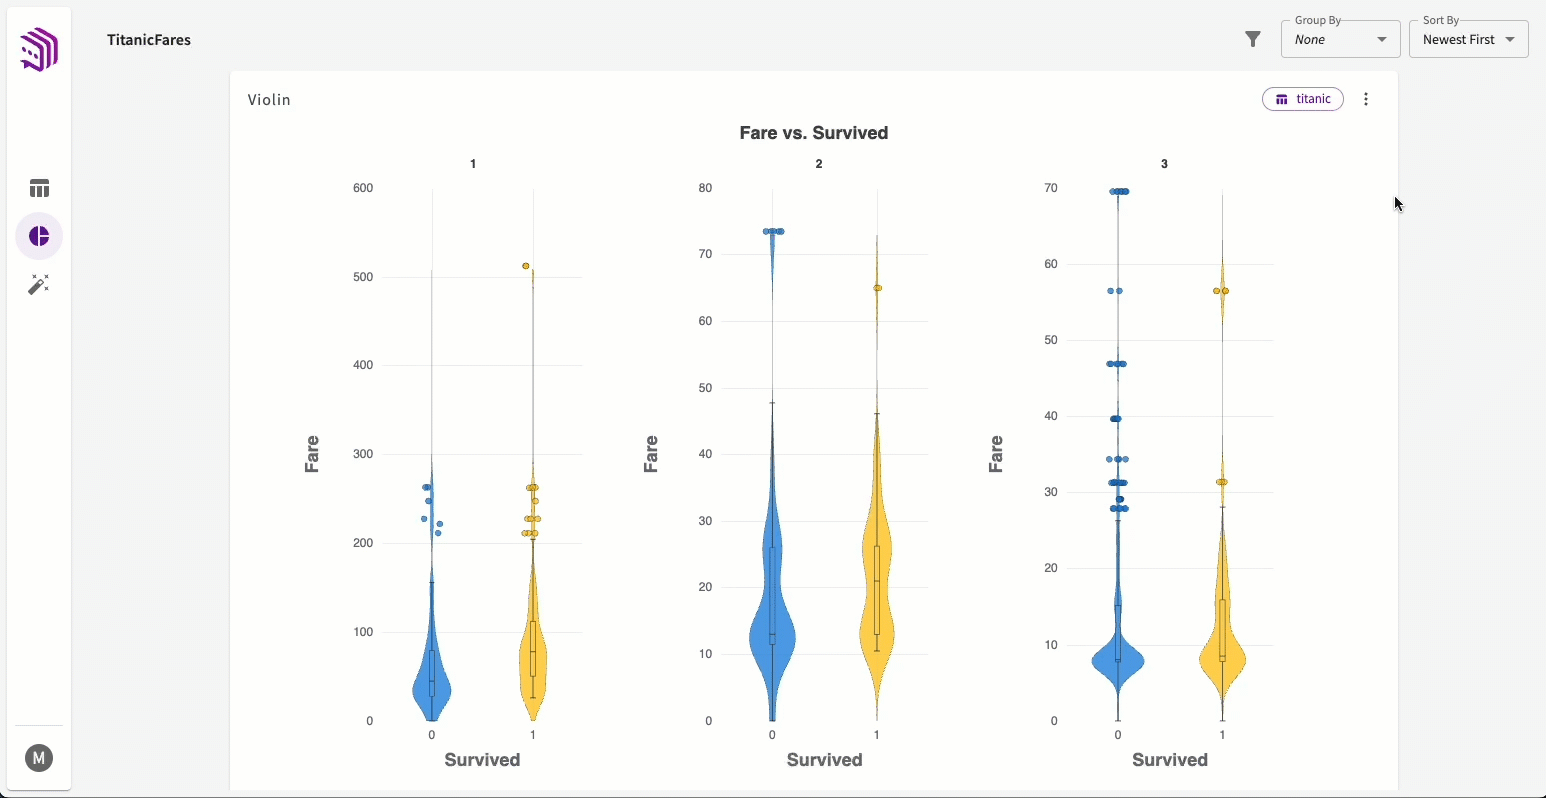
To publish charts, notes, or tables to an Insights Board:
- Open a session.
- Create charts, notes, or tables you would like to present.
- Click Publish (+) from the chart, note, or table.
- Select an existing Insights Board to publish to, or create a new one.
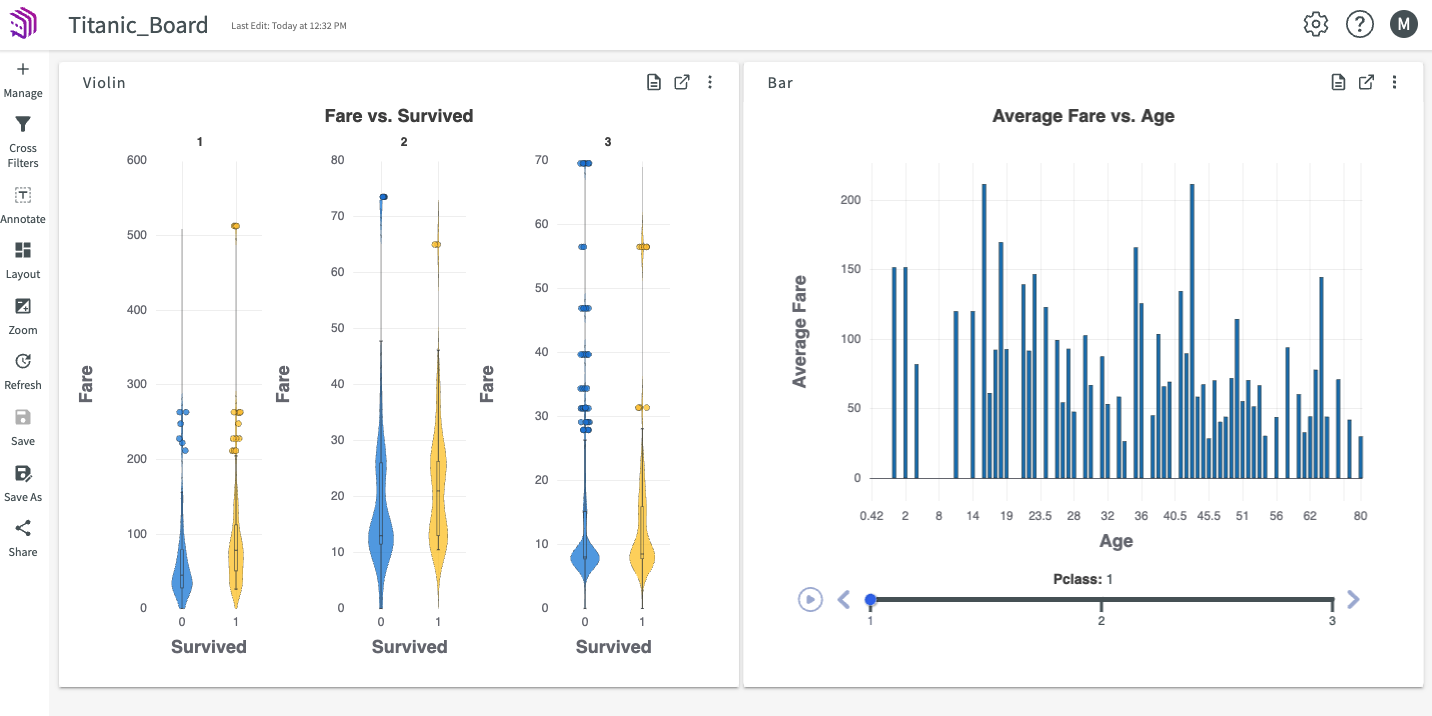
Open an Insights Board
To open your new Insights Board:
- Navigate to either My Work or Insights Boards on the homepage.
- Double-click on the Insights Board you'd like to open.
If your previous publications are successful, all published items appear:
Use an Insights Board
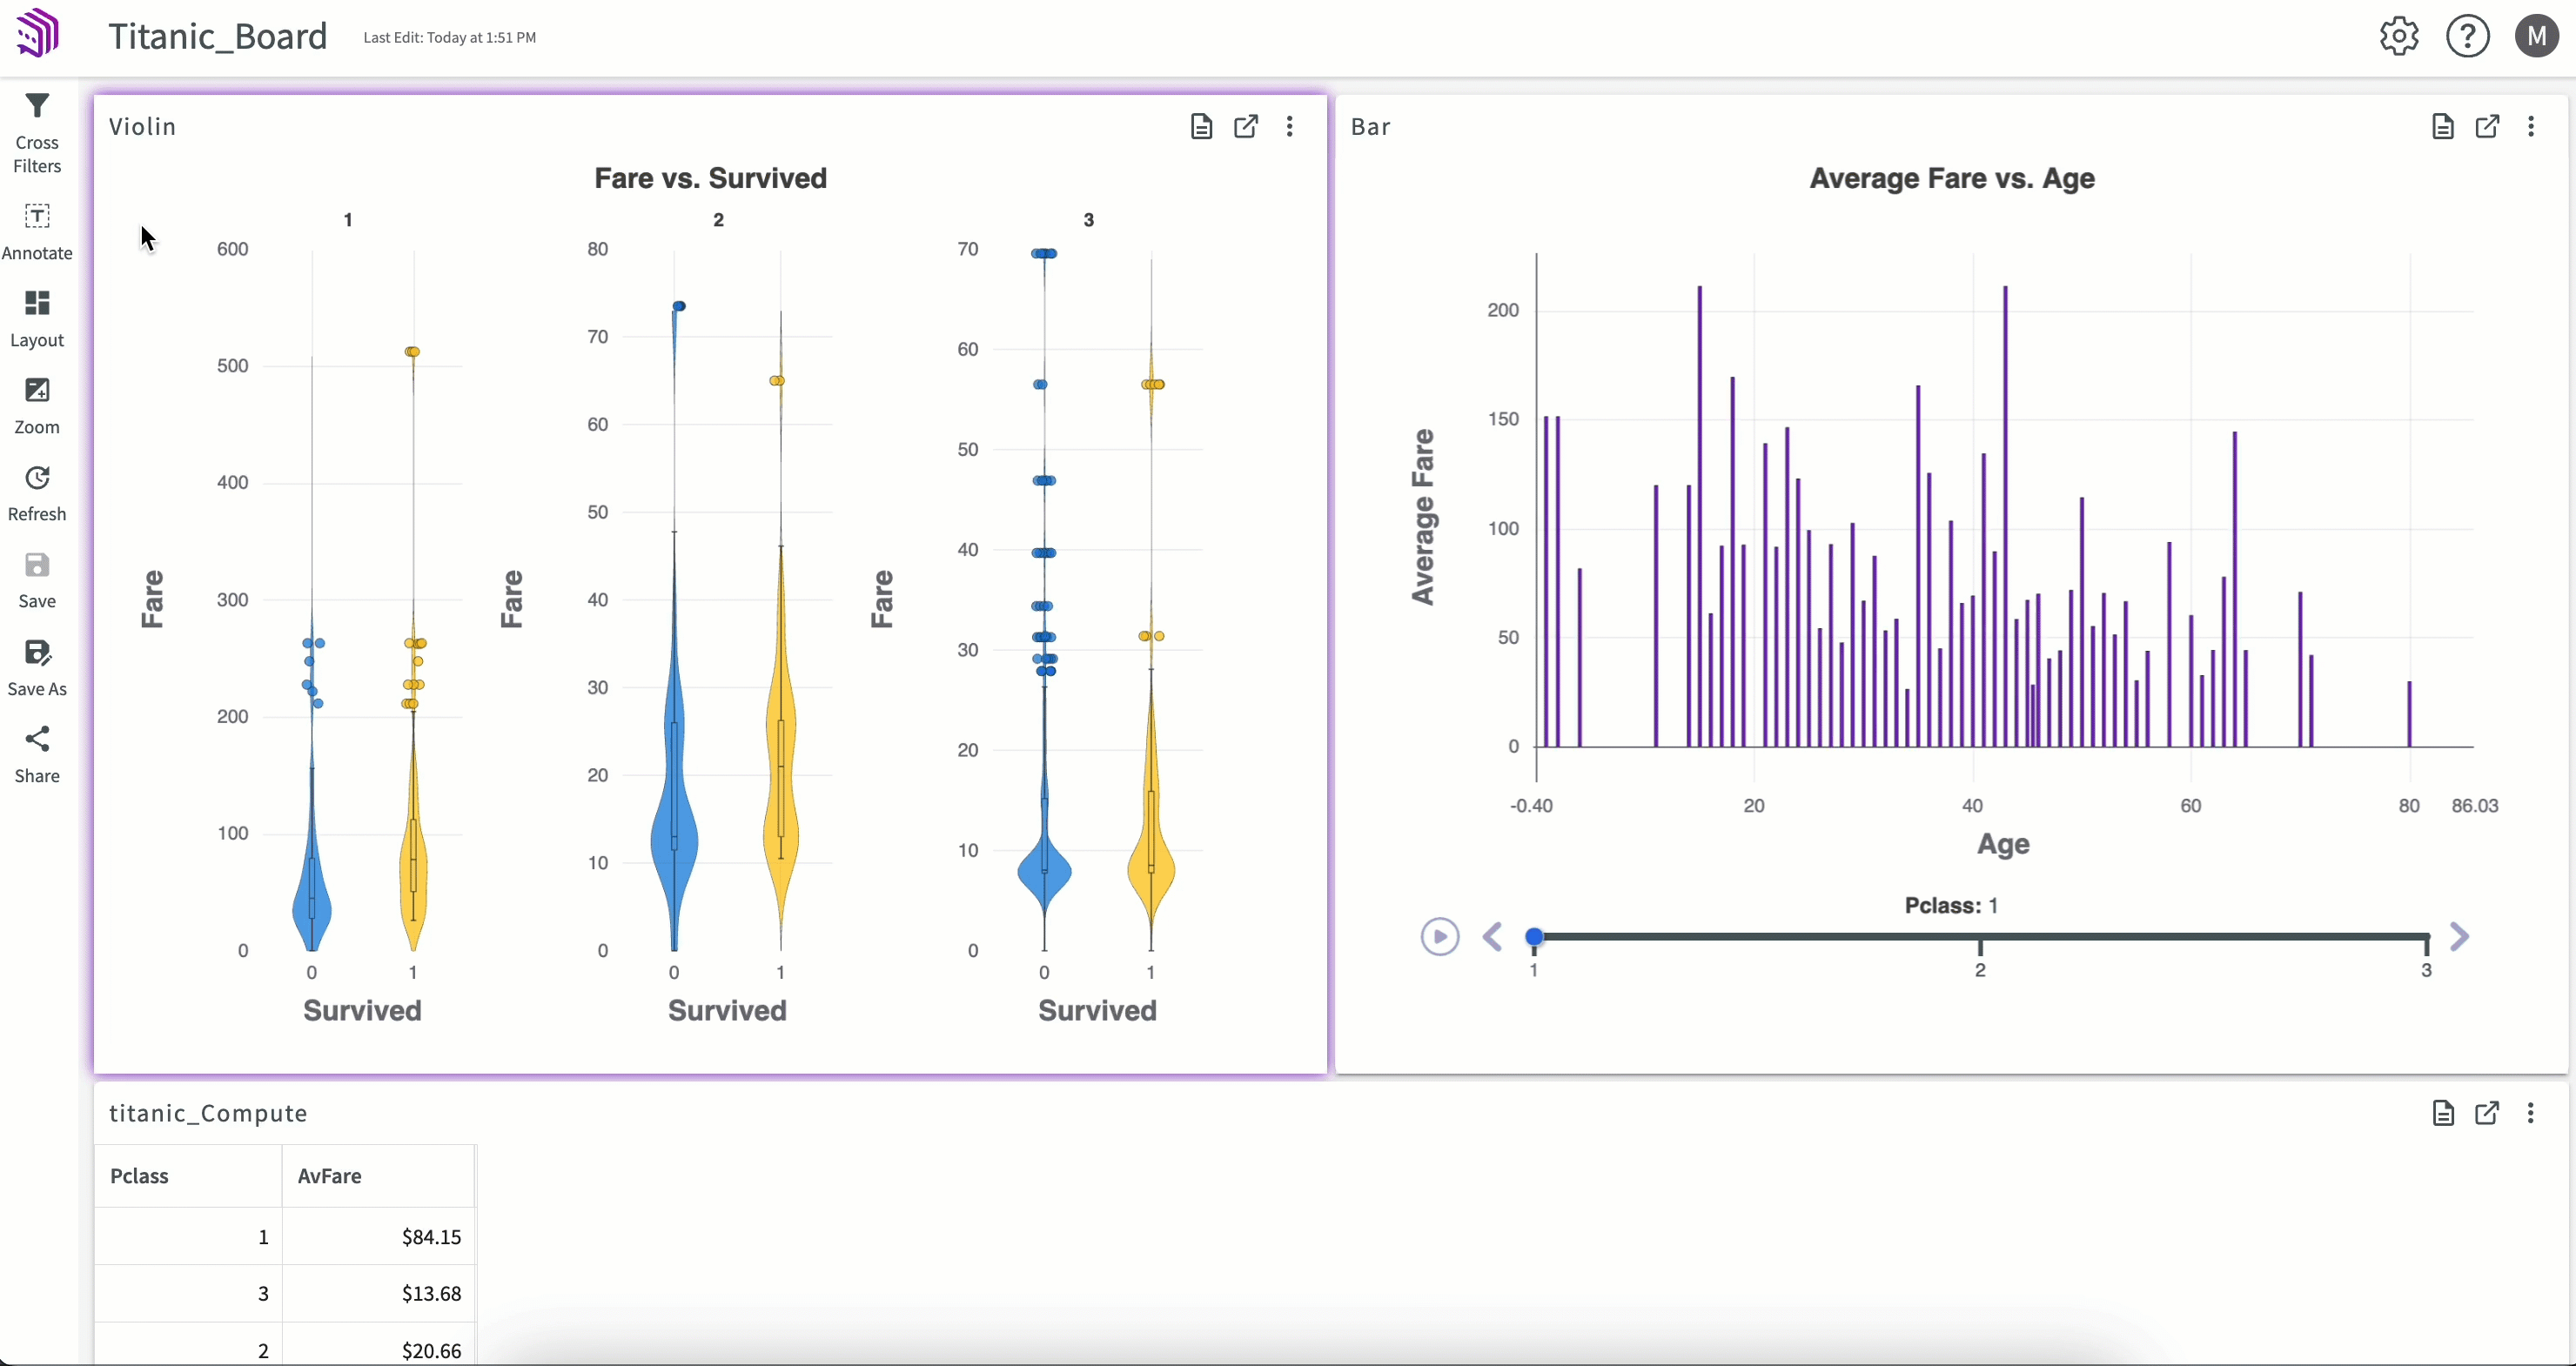
Once you have charts, notes, or tables published to your Insights Board, there are several actions you can take to make changes to the board.
Edit a Chart
After you publish a chart to an Insights Board, you can use the Edit button located in the More menu to make updates to your chart including, but not limited to:
- Changing the chart type
- Changing the axis values
- Changing font sizes
- Adding filters

Not all chart types can be edited. See Edit Charts for more information.
Edit or Preview a Publication's Workflow
Depending on the publication type, you can edit the workflow behind the publication to make changes to the steps that created it.
You can use the Chart's Workflow button to both preview the workflow that created the publication and open it in the Editor if you need to make changes. Refer to the Edit a Workflow topic for more information.

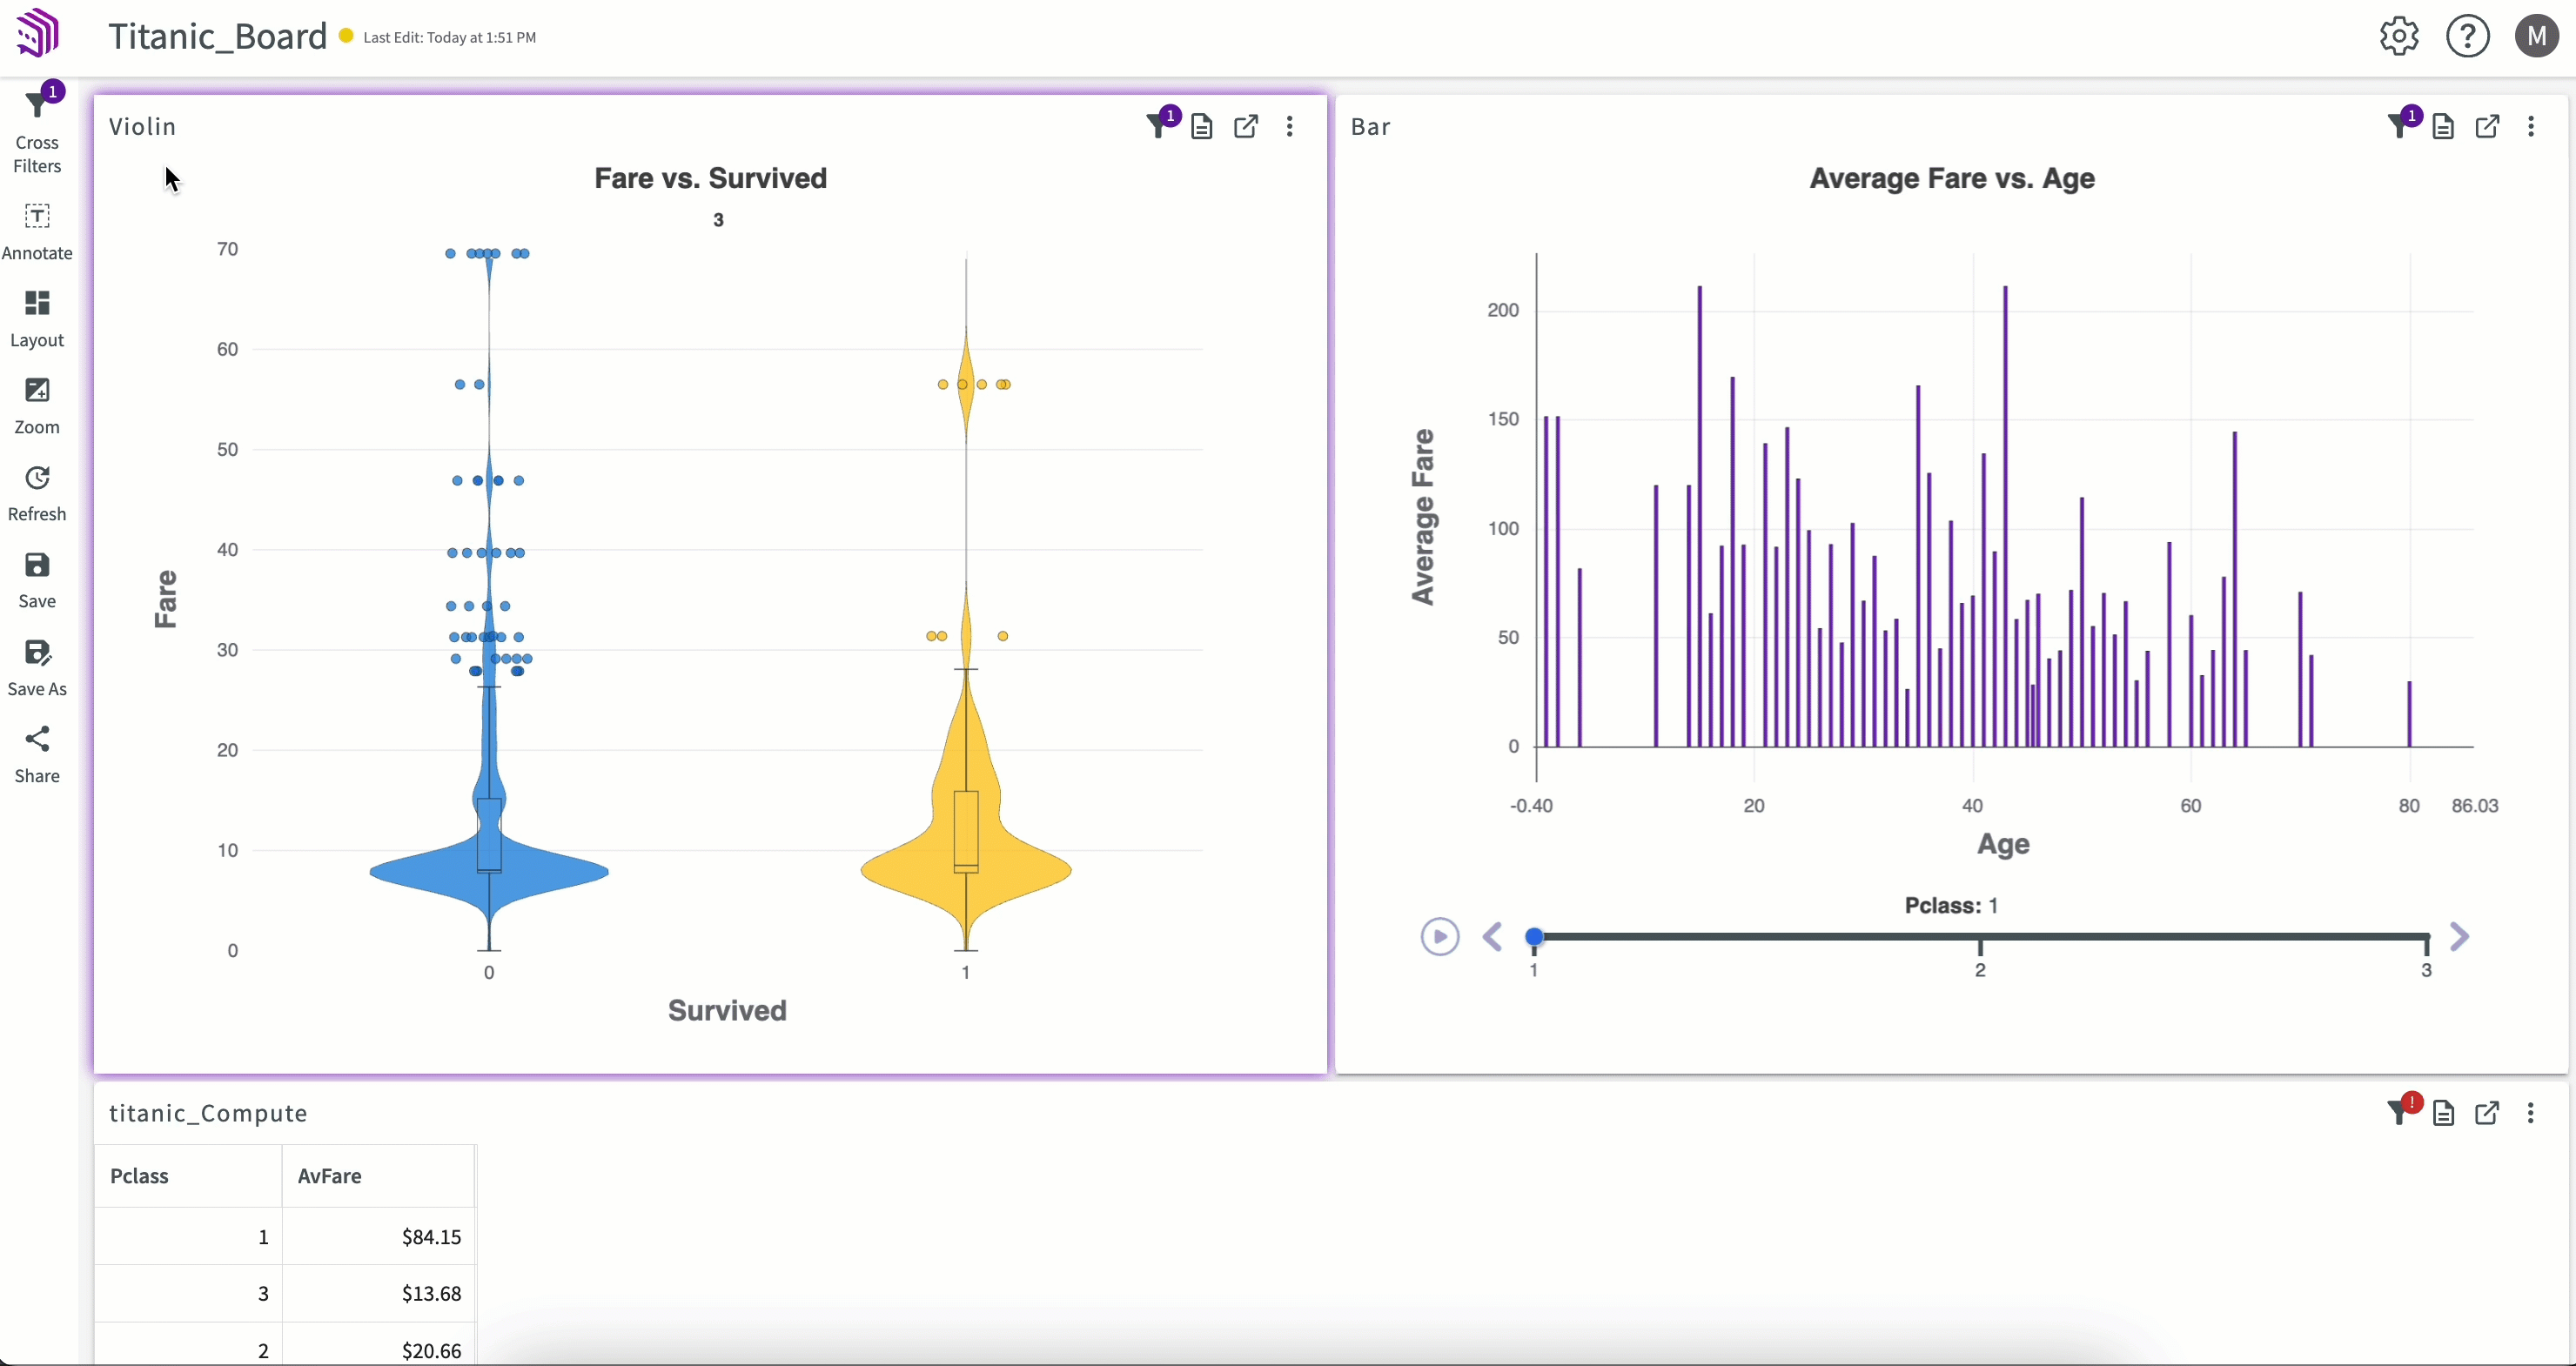
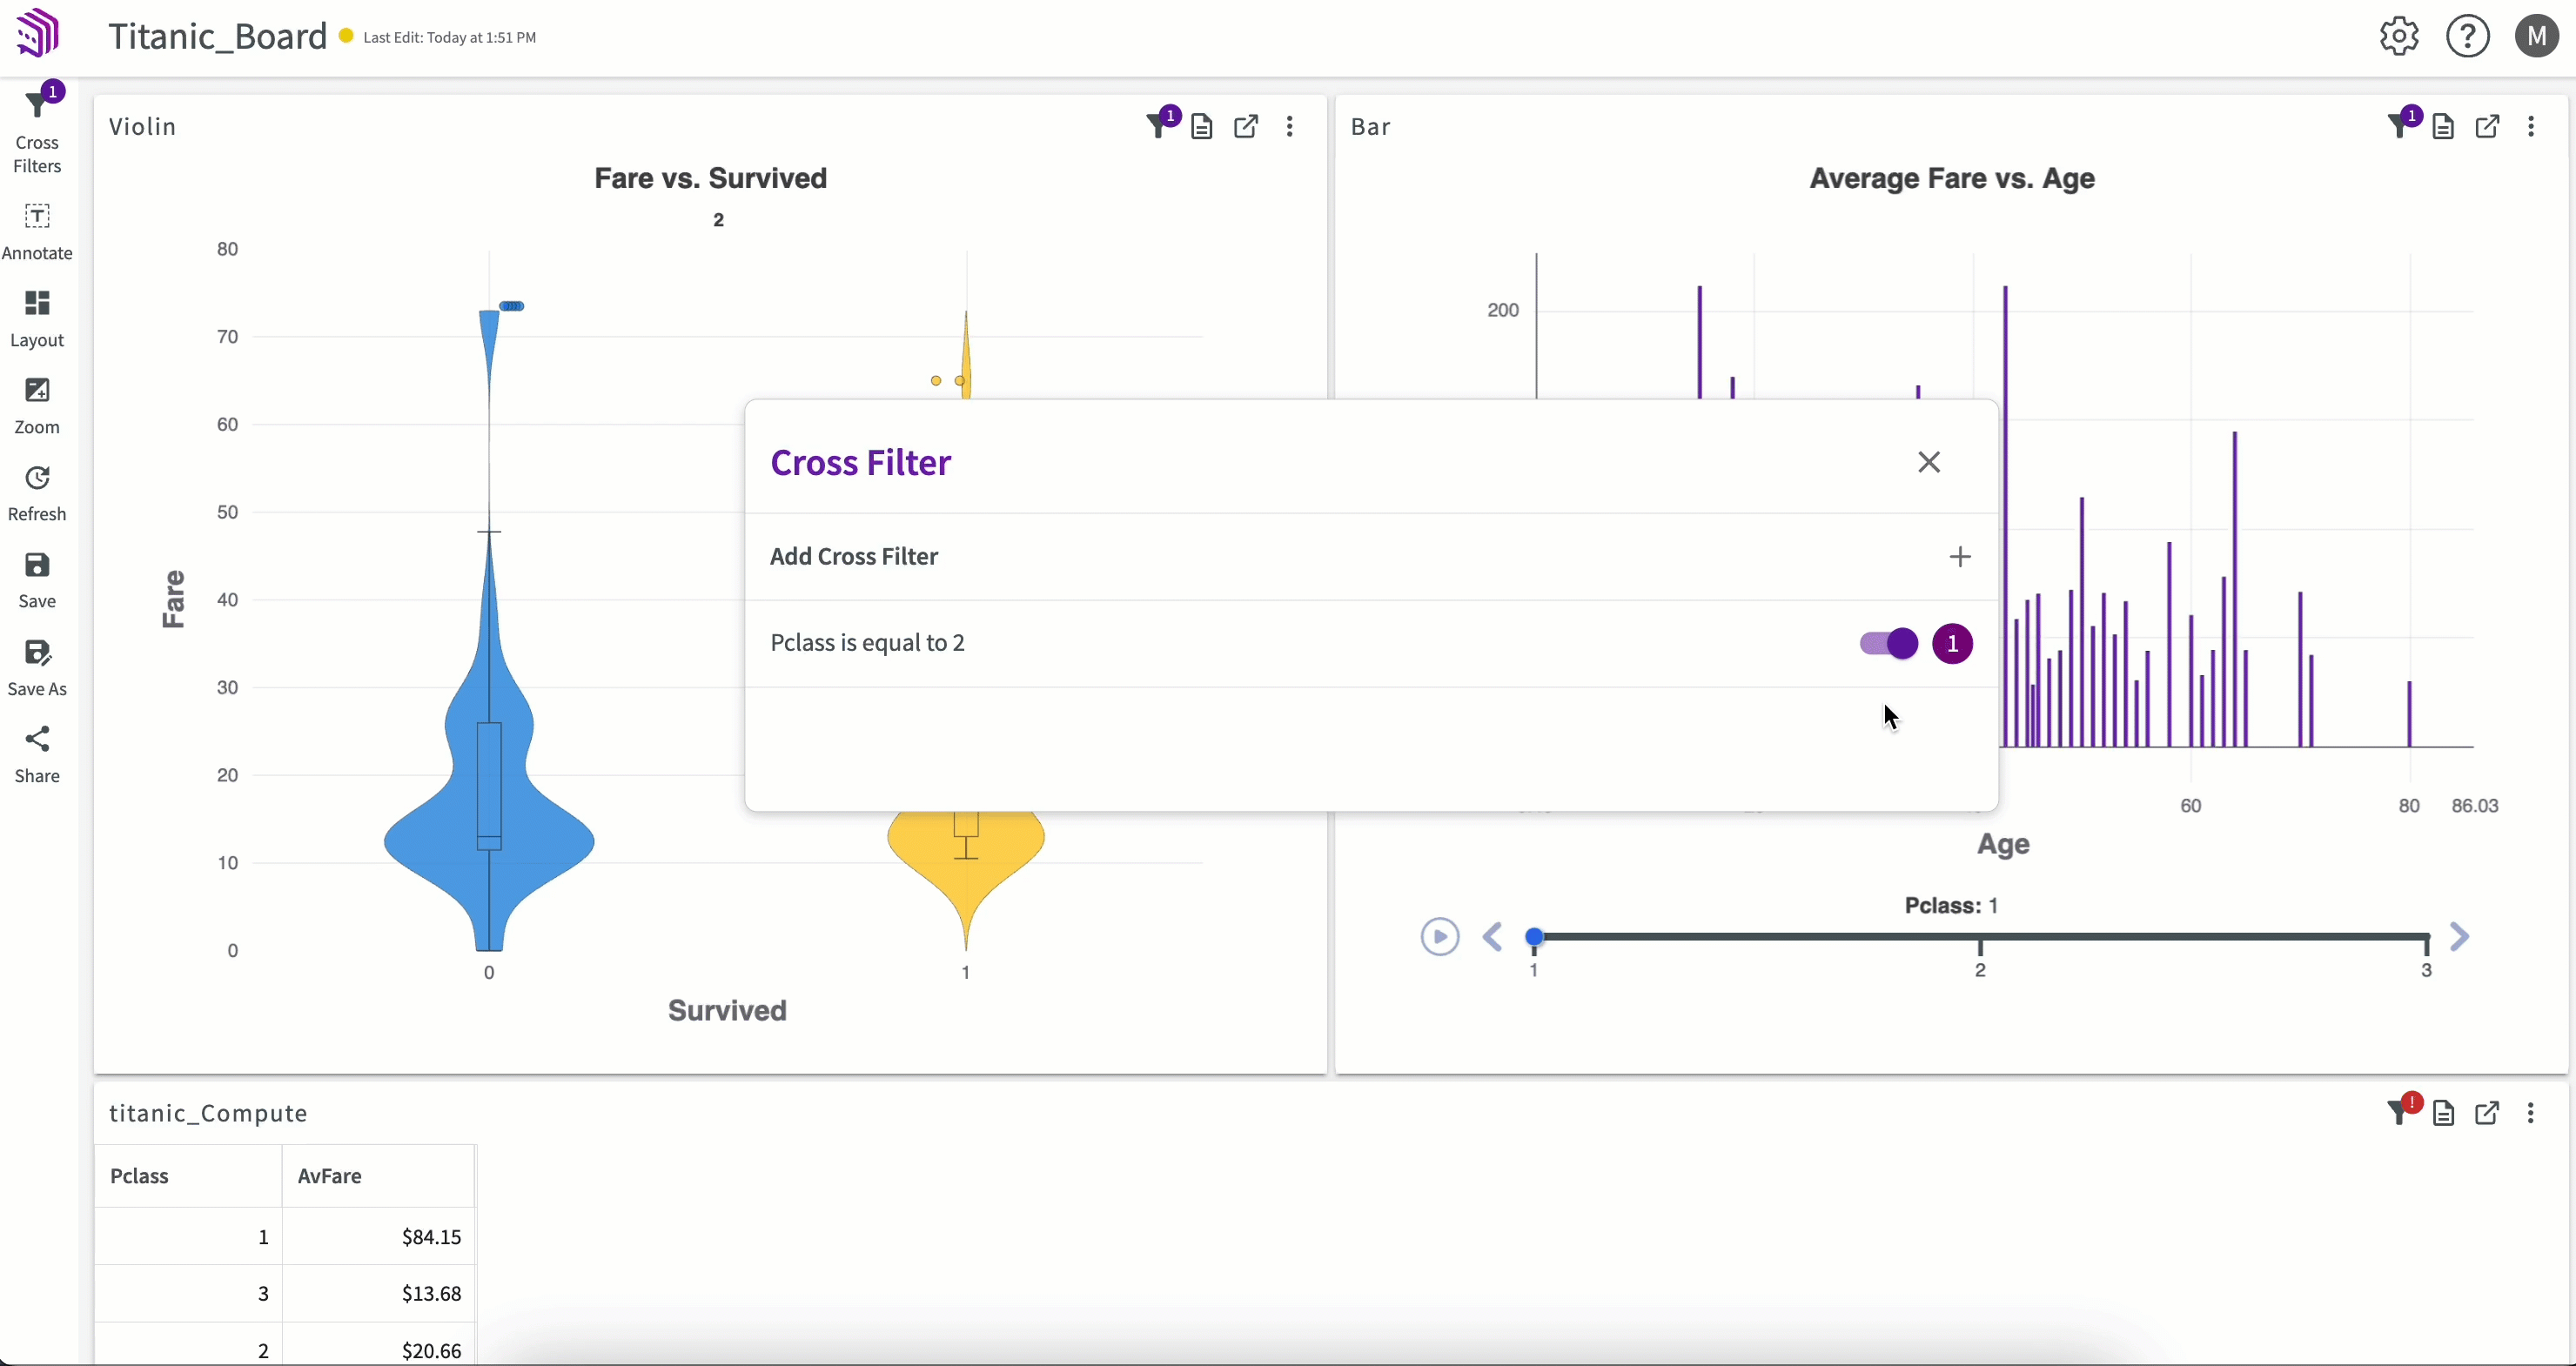
Add a Cross Filter
Cross-filtering is currently unavailable for tables and certain chart types.
Cross-filtering can be used to navigate, categorize, and compare data on your Insights Board. It functions by automatically filtering all objects based on a shared value. This is especially helpful when trying to understand how one metric affects another. You can also specify multiple filters and toggle each filter on or off. To create a cross filter:
- Click Cross Filters in the sidebar.
- Click Add Cross Filter.
- Enter the column, expression, and value to filter on.
- Click Apply.
By default, the cross filter is automatically toggled "on" and applied to your Insights Board. If multiple filters are used, the results are additive. The number of active filters applied to the Insights Board is indicated by the purple number icon on the Cross Filters button in the sidebar and the number of active filters for each object is shown by the filter icon in the object's header.
Edit a Cross Filter
Filter Expressions
To edit a cross filter's expression:
- Click Cross Filters in the sidebar.
- Select the cross filter to edit.
- Make your changes and click Save. You can also delete a cross filter by clicking Remove instead.
Filtered Objects
To edit which objects the filter is applied to:
- Click Cross Filters in the sidebar.
- Click the number icon next to the cross filter to edit.
- Select objects to apply or remove the filter.
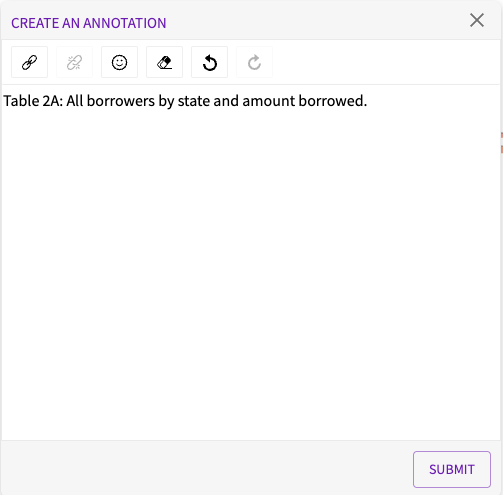
Add Annotations
You can also add annotations to your Insights Boards. Annotations are similar to notes, but they are created directly from an Insights Board and have some additional formatting options. To create a new annotation:
- Click the Annotate button in the sidebar.
- Add and style your content, then click the Submit button.
Remove Content
To remove an object from an Insights Board, click the object's More menu and select Remove publication.
Refresh Content
Click the Refresh Content button to refresh your charts, tables, and notes. This reruns the underlying workflow that created the chart or table and updates it with any changes in the data. Each panel has a timestamp showing when the content was last refreshed.

Save Changes
To save any changes you've made to your Insights Board, click the Save button in the toolbar. When you come back to the Insights Board, your saved changes become the new defaults.

Create a Copy
You can make a copy of your Board using the Save As button. You can find the copy on the homepage.

Share an Insights Board
There are two ways to share an Insights Board:
- Collaborate with another user
- Create a public link

Share with Another User
To share with another user in your organization, you can either share an Insights Board from the homepage or:
- Click Share in the sidebar.
- Select the users with whom to share.
- Click Yes to confirm.
You can remove users by clicking the X next to their name.
Create a Public Link
Public links can be turned off by setting DATACHAT_PUBLIC_LINKS to false in your DataChat configuration. Work with your DataChat representative to make this change.
You can create a public link to share with users who don't have access to DataChat or aren't logged in. Insight Boards accessed through a public link are view-only. Users cannot refresh or edit the contents of the Boards.
To create a link:
- Click on Share in the sidebar.
- Click Make Public and then Copy Link to save the link to the clipboard.
- Share the public link.