Snowflake
Requirements
To connect DataChat to Snowflake, you’ll need:
- Database name
- Hostname
- Compute warehouse
- Username and password (only if using a service account)
Permissions
To connect to a Snowflake database, your account must have the following permissions:
USAGEon the database and schema. This allows access to the database and visibility into schemas and their structure.SELECTon tables and/or views. This allows reading data and listing available tables/views. This can be inherited from the schema level.
You do not need to grant these permissions on INFORMATION_SCHEMA. If your role has USAGE on the database, it can query INFORMATION_SCHEMA automatically.
Connection Methods
OAuth
Refer to Enable Database OAuth for more information.
Service Account
If you're using a service account to connect Snowflake, follow these steps before connecting in DataChat:
Create a New User in Snowflake
For shared service accounts, we recommend creating the user with TYPE = LEGACY_SERVICE.
Refer to Snowflake's documentation on CREATE USER for full syntax. Below are the attributes we recommend:
CREATE USER datachat_user
  PASSWORD = 'YourSecurePassword'
  DEFAULT_ROLE = data_viewer
  MUST_CHANGE_PASSWORD = FALSE
  TYPE = LEGACY_SERVICE;
You can also create and assign a custom role for more granular control.
Once the user is created, grant the required permissions.
Store Credentials
Before setting up the connection in DataChat:
- Keep note of your Snowflake username and password for the service account.
- Ensure the account has access to the necessary database, schema, and tables.
Add Your Snowflake Database
DataChat follows Snowflake’s native rules for database name casing:
- Unquoted database names are treated as case-insensitive and are automatically converted to uppercase (e.g.,
mydbbecomesMYDB). - Quoted database names are treated as case-sensitive and must match the exact casing used in Snowflake.
If your database name uses mixed or lowercase letters and you want to preserve casing, wrap it in double quotes when entering it in step 6 below.
To add your Snowflake database:
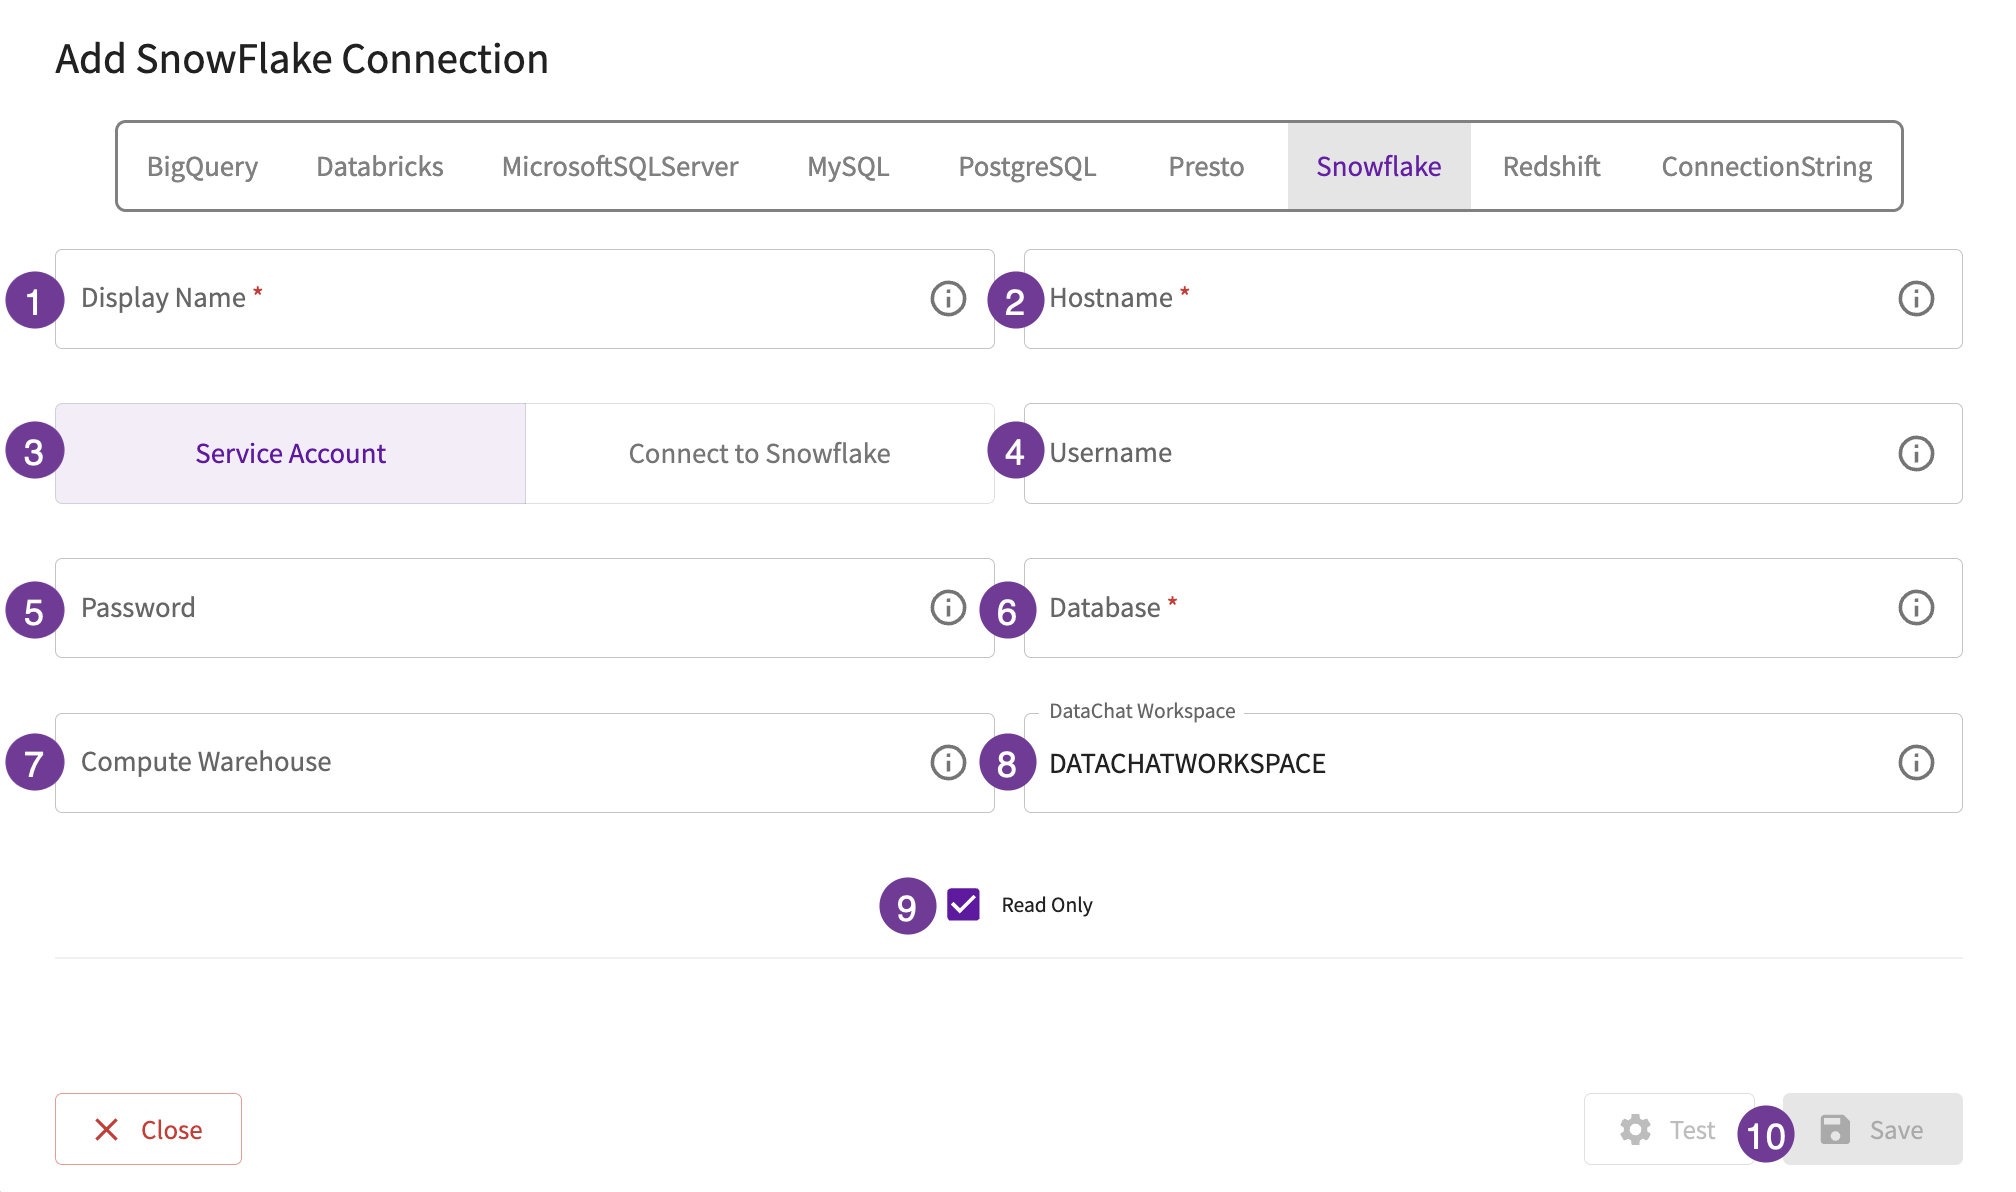
- Give the database a display name. This is how you'll reference the database across DataChat.
- In the Hostname field, enter your account identifier.
-
- Select whether this connection will use a service account or connect to Snowflake via OAuth.
- In the Username field, enter the username needed to connect to the database.
- In the Password field, enter the password needed to connect to the database.
- In the Database field, enter the name of the database.
- In the Compute Warehouse section, optionally set the Compute Warehouse field – enter the default warehouse to use.
- Optionally, set the DataChat Workspace field – enter the name of the workspace to use. A workspace is similar to a schema in other database systems.
- Optionally, set the database to be read-only.
- Test your database, then click Save.