Databricks
Requirements
To connect DataChat to your Databricks project, you’ll need:
- Catalog name
- Database (schema) name
- Connection details of your SQL warehouse
- Hostname
- Port number (usually
443for Databricks) - HTTP path
- Access token
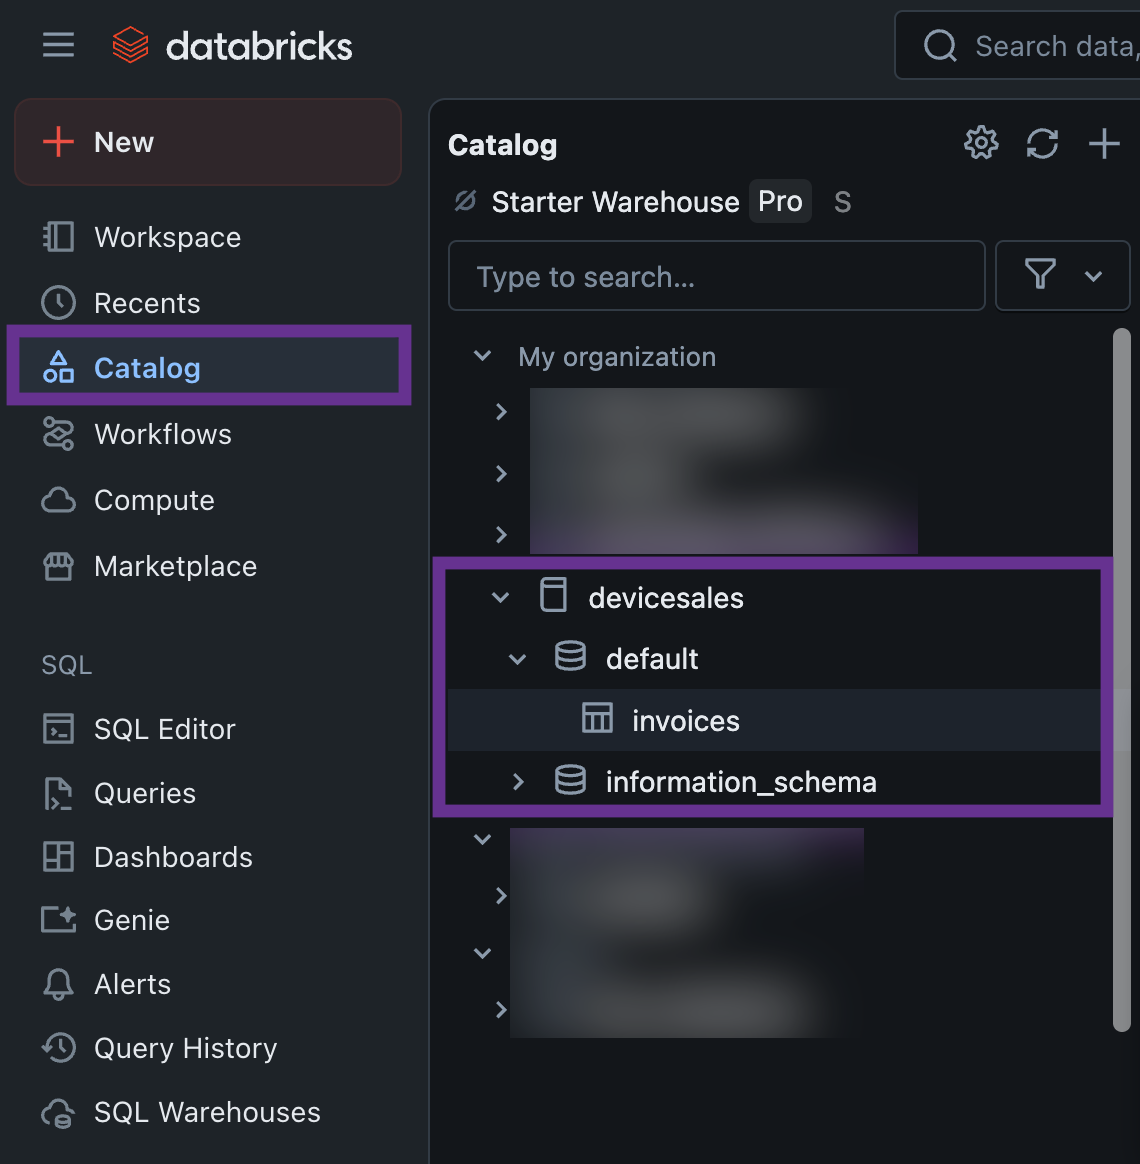
Find Your Catalog and Database (Schema) Name
In your Databricks Workspace, click Catalog in the left sidebar to browse through the available catalogs and databases.
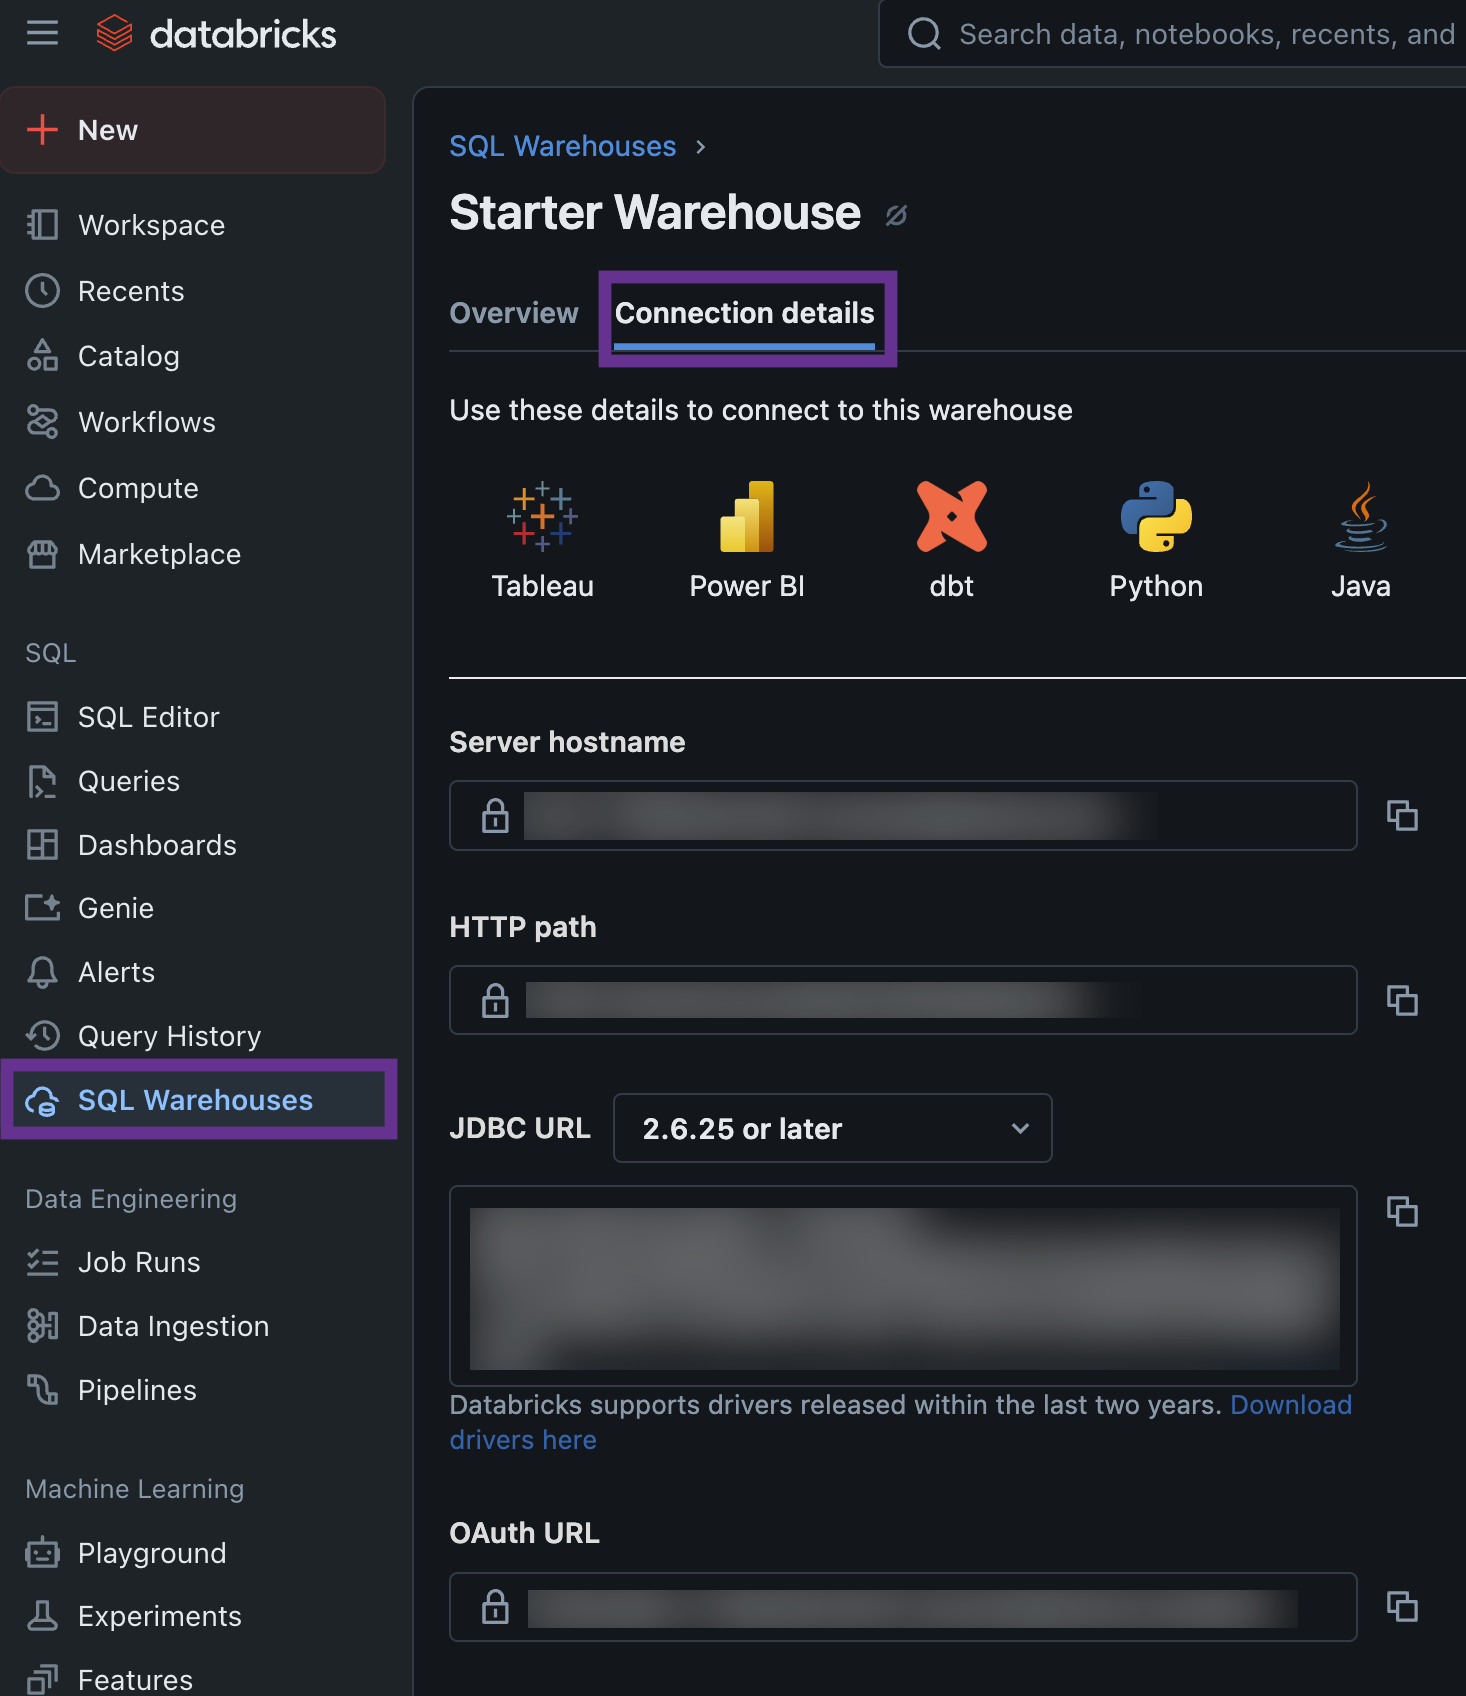
Find Your Hostname and HTTP Path
In your Databricks Workspace, click SQL Warehouse in the left sidebar, and select the SQL warehouse to connect to. Under Connection Details you'll find:
- Hostname: The server hostname in the format
<workspace>.cloud.databricks.com - HTTP Path: The specific path for your SQL Warehouse in the format
/sql/<version>/warehouses/<identifier>
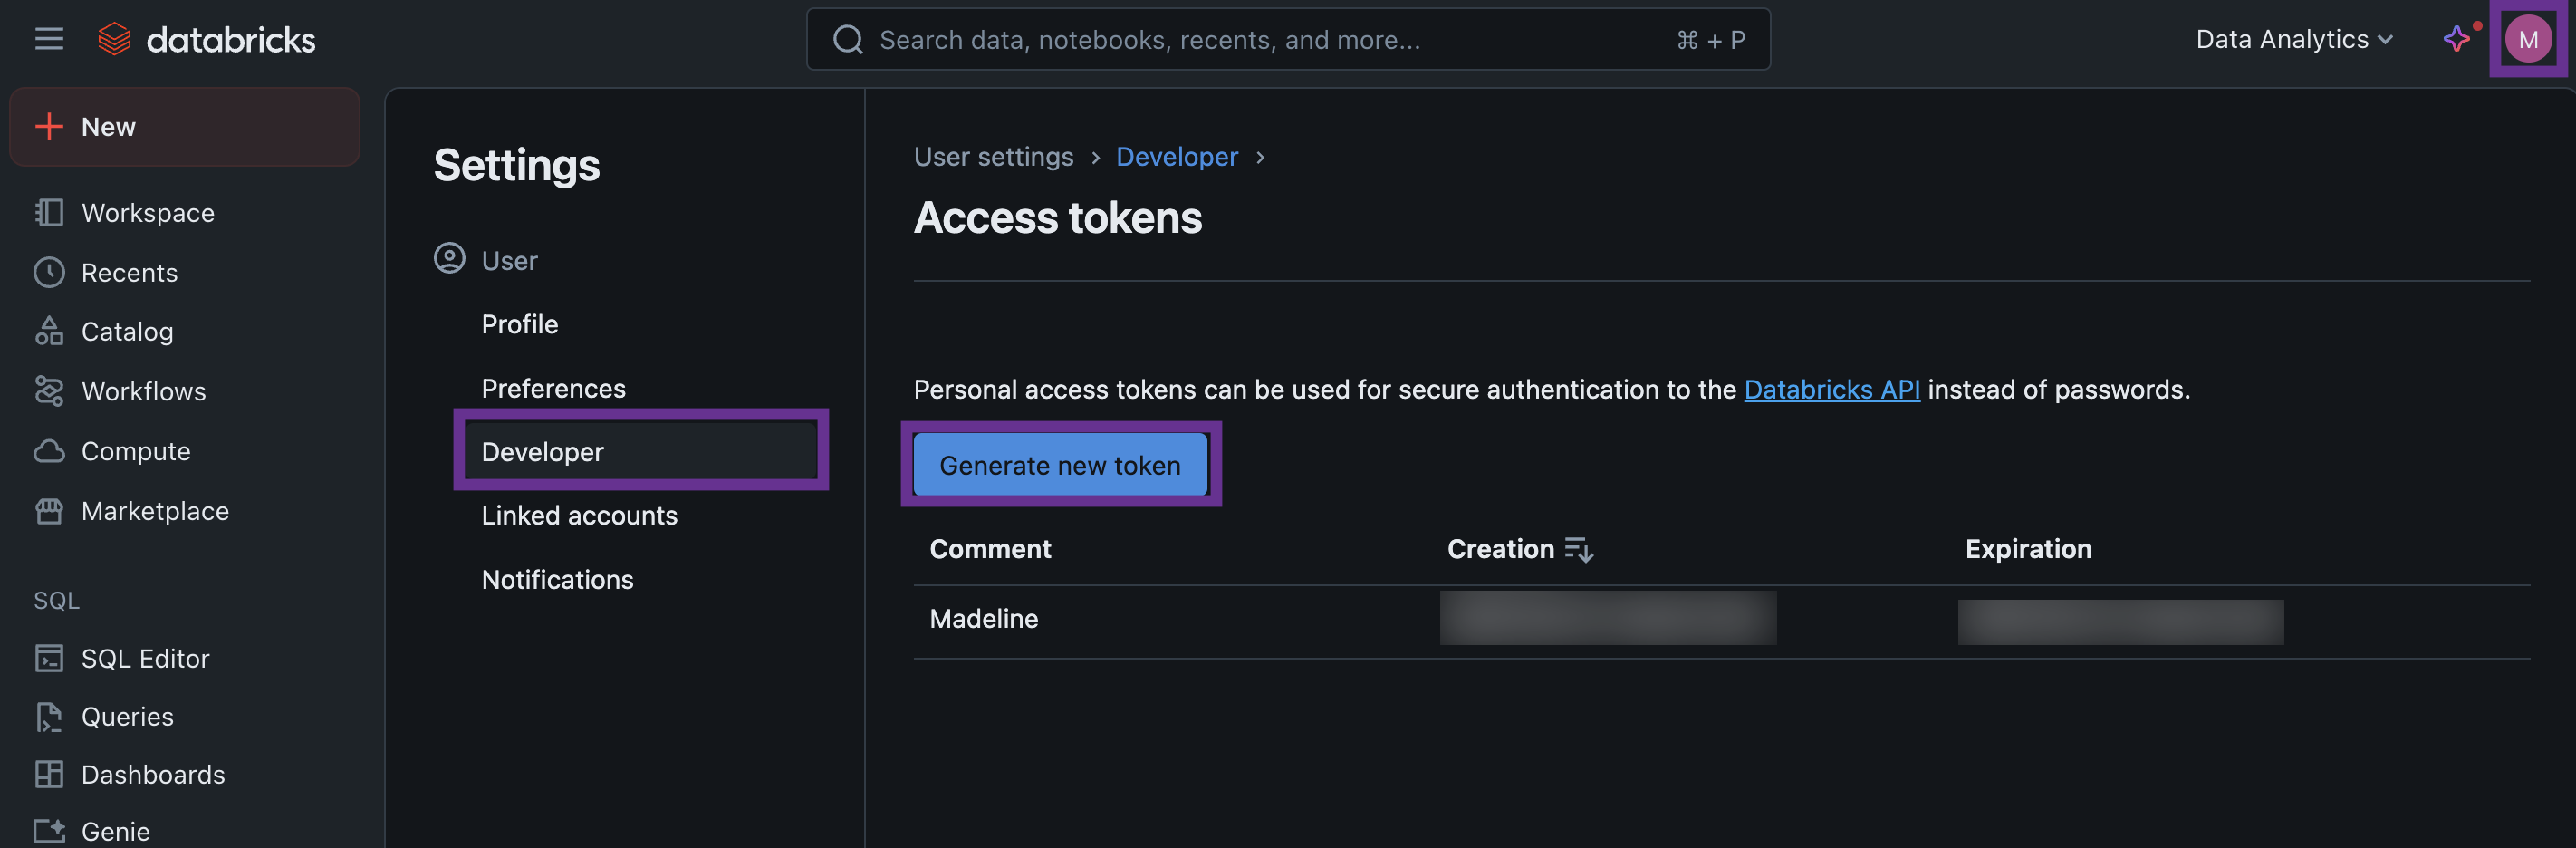
Generate an Access Token
In your Databricks Workspace, click your user icon in the top-right, then click Settings > Developer > Access Tokens > Manage > Generate New Token.
Permissions
To connect to a Databricks database, your account must have the following permissions, applied at the appropriate scope, such as the table, view, schema, or catalog level:
BROWSE. Allows viewing and listing tables in the Database Browser (catalog level).USE SCHEMA. Grants access to read data from schemas within the assigned scope.SELECT. Enables reading rows from tables within the assigned scope.
In Databricks, permissions can be set at different levels depending on your workspace setup. For example, granting SELECT at the catalog level gives access to all tables within that catalog.
Add Your Databricks Database
To add your Databricks database:
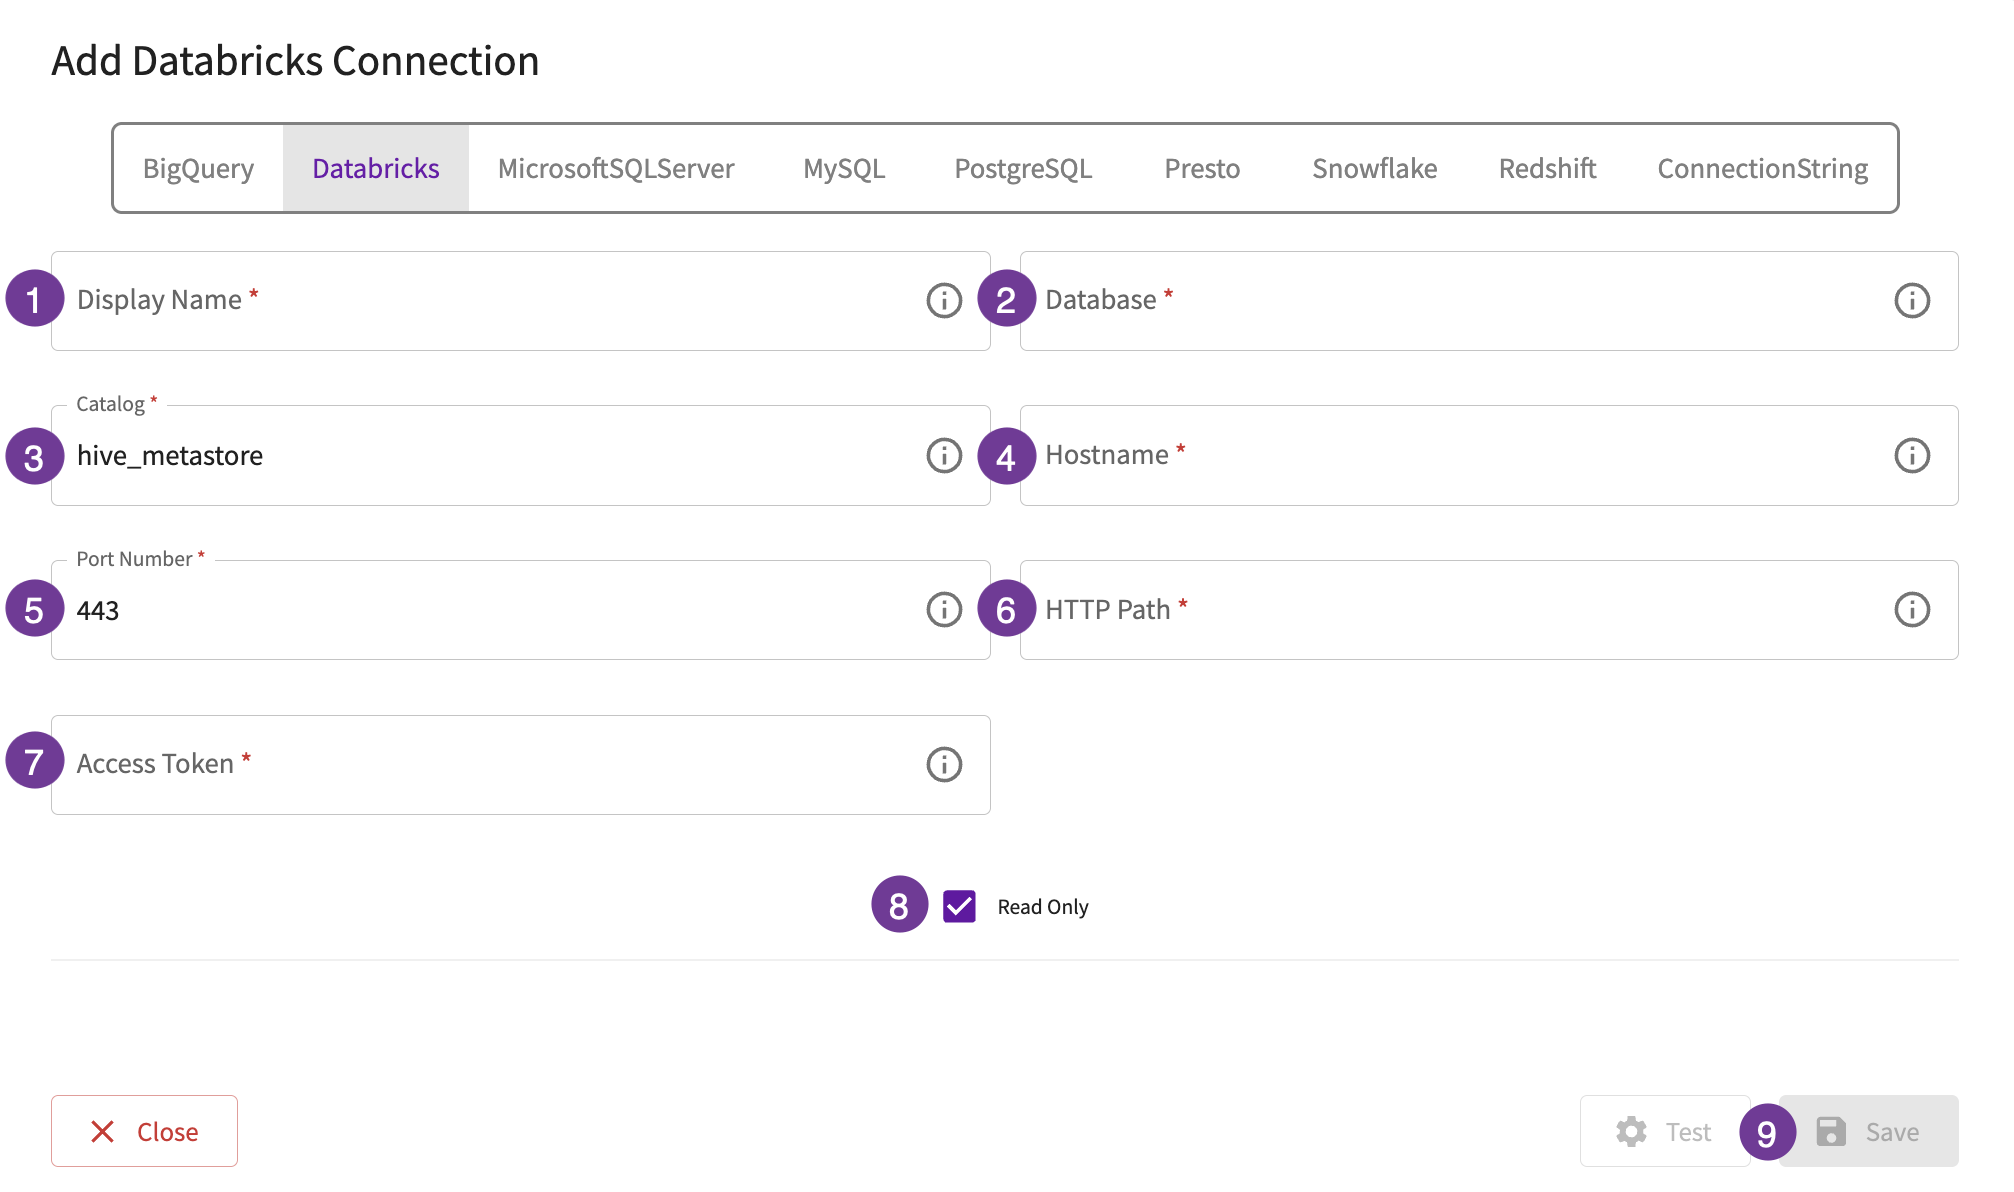
- Give the database a display name. This is how you'll reference the database across DataChat.
- In the Database field, enter the name of your Databricks database.
- In the Catalog field, enter the name of your Databricks catalog.
- In the Hostname field, enter the hostname or IP address of the database.
- In the Port Number field, enter the port for the database.
- In the HTTP Path field, enter the URL needed to connect to the database.
- In the Access Token field, enter the access token needed to connect to the database.
- Optionally, set the database to be read-only.
- Test your database, then click Save.