Datasets
Datasets are essential to working in DataChat. They can be created by importing tables from database connections or uploading files. By default, DataChat includes four example datasets to help you get started:
telcoCustomerChurn. Customer retention data from a telecommunications company.Credit_Risk. Lending and default likelihood data for credit users.Heart_Health. Key indicators related to heart disease.Hotel_Reservations. Online booking data exploring trends in reservations and customer behavior.
Creating Datasets
From Database Connections
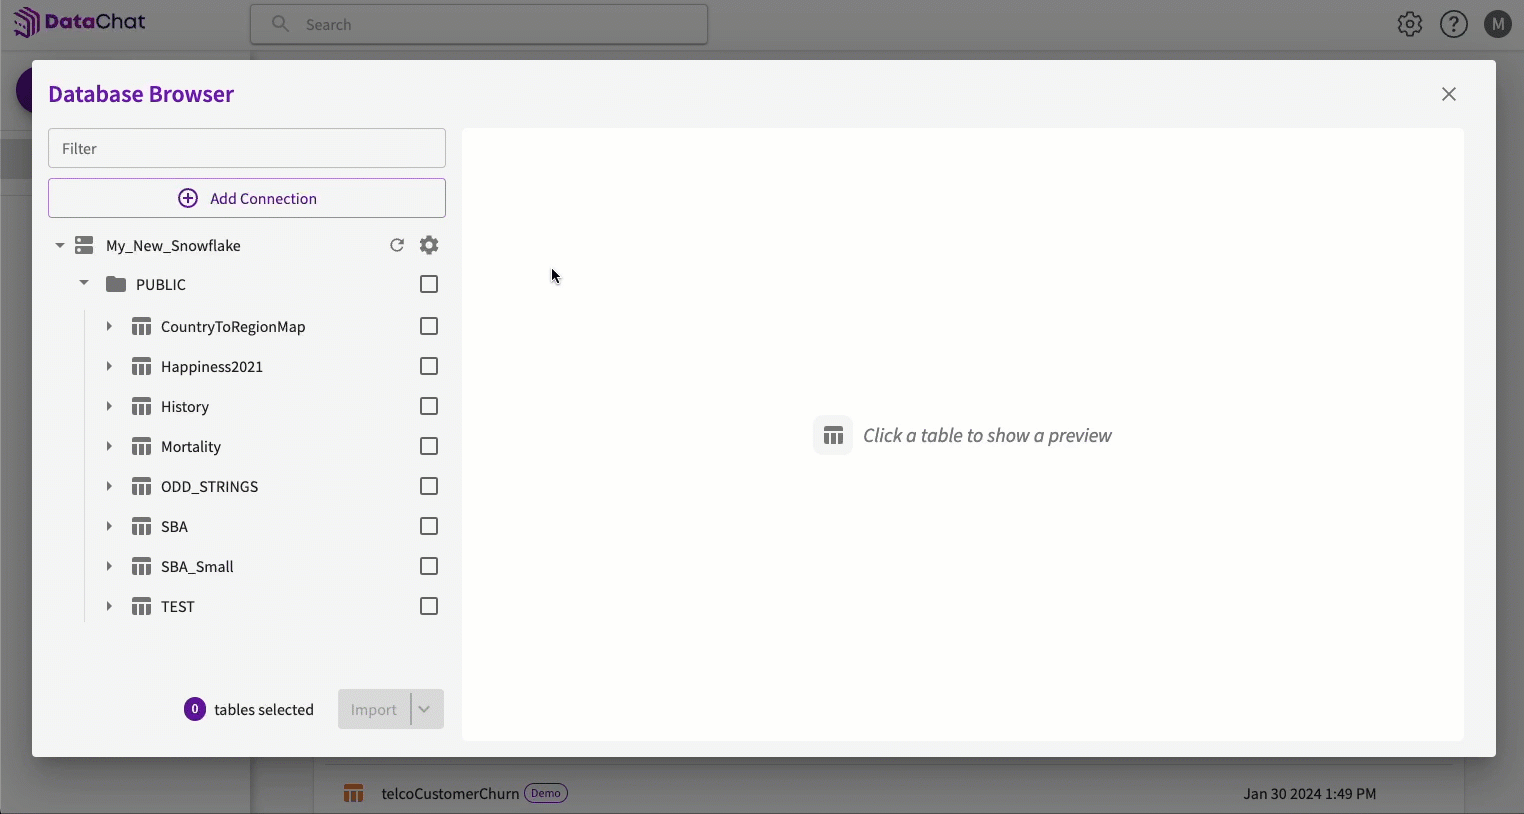
To create a dataset, you must first create a database connection or open an existing database connection in the Database Browser, then:
- Select the connection to import tables from.
- Select the tables to import.
- Optionally, preview the tables by clicking the table name.
- Click Import to import the tables as datasets on the homepage. Or, to load the tables directly into a session, click Import and Load.
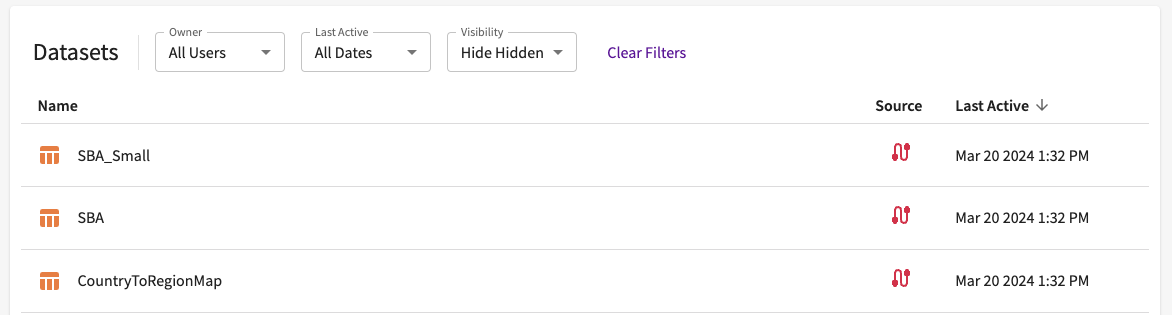
Imported datasets will appear in My Work under a folder labeled database name > schema name > datasets. They will also be listed in the Datasets section of the homepage.
From Local Files
Uploading files from your machine is unavailable in DataChat when purchased through the Snowflake Marketplace.
Use local files for small, static, or one-off datasets. Supported file formats include:
- Comma-separated values (.csv)
- Excel (.xlsx)
Datasets created from local files can contain at most 1600 columns.
From the Homepage
- Click New > Dataset > Upload.
- Drag and drop your dataset file, or browse your local machine.
If the uploaded file contains multiple sheets, a new folder named <filename> is created in My Work, with each sheet saves as a separate dataset.
Within a Session
- In the Skill menu, click Add Dataset > Upload. Optionally, you can also use New Dataset > Upload if data has not yet been uploaded.
- Drag and drop your dataset file, or browse your local machine.
Uploaded datasets automatically load into your session and appear in My Work and the Datasets section of the homepage.

Load Datasets into a Session
From the Homepage
To load a single dataset into a session from the homepage, locate the dataset from either My Work or the Datasets section and double-click the dataset to load. This automatically opens a new session and loads the selected dataset.
To load an entire folder of datasets into a session from the homepage:
- Select the folder to load datasets from.
- Right-click and select Load Folder. Optionally, you can also use the Load Folder button in the toolbar.
This automatically opens a new session and loads all the datasets within the selected folder.
Within a Session
To load datasets from within a DataChat session:
- In the Data tab, select Add Dataset > Load in the skill menu. You can also click New Dataset if data has not yet been loaded.
- Select a dataset or folder. Optionally, use the dropdown next to a folder to see its contents.
- If you dataset is not shown, you can Search for the dataset.
- Click Load. Alternatively, for loading a single folder or dataset, you can double-click on the respective item.
The datasets will load into your current session, and the window will close automatically.

Refresh Saved Datasets
If you've saved active datasets in a session, you can refresh them when the underlying data source has been updated.
To refresh:
- From the homepage, navigate to either My Work or Datasets.
- Click the Refresh button next to the dataset you'd like to update.
This automatically opens the Editor and runs the underlying workflow that created the dataset. If the underlying workflow is run successfully, a green check appears to the left of the dataset name.

Edit a Dataset
The underlying workflows of these datasets can also be edited to add or remove steps. Refer to Edit Steps.
While steps that create other objects such as charts or models can be added, only the steps that modify or change the state of the dataset are applied.
If you edit the underlying workflow, the workflow changes to unverified, and the green check changes to a red icon.
If no errors are encountered, the workflow is automatically verified and saved.