Workflows
DataChat workflows describe all of the steps taken on your datasets, from data ingestion to transformation to analysis, and are recorded as step-by-step instructions that can be used to reproduce an entire session. The workflow can then be edited, replayed, and shared as needed.
Create a Workflow
To save your current session as a workflow:
-
Click Save in the skill menu.
-
Select Session as a workflow.
-
Enter a name for the workflow.
-
Click Submit.

This saves your session as a workflow object, which you can access from the homepage.
Save a Copy of a Workflow
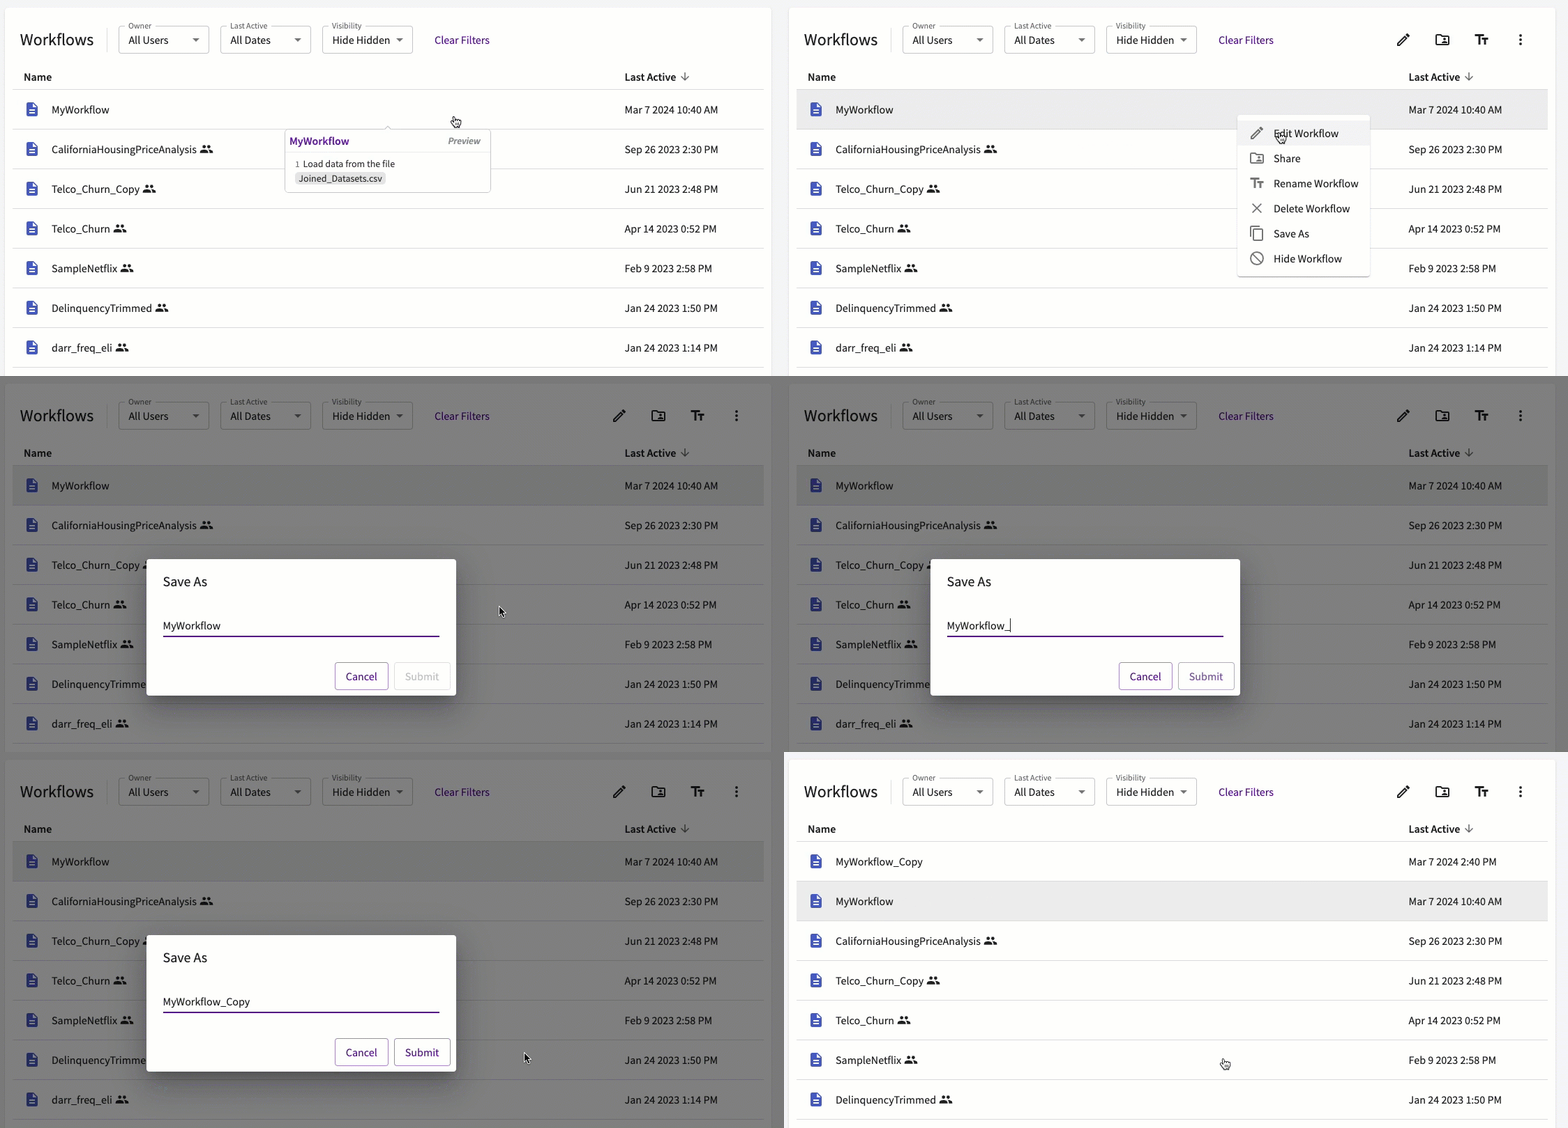
From the homepage, navigate to either My Work or Workflows, then:
-
Select the workflow to copy.
-
Click More options or use the right-click menu.
-
Click Save As and then enter a new name for the copy.
Edit a Workflow
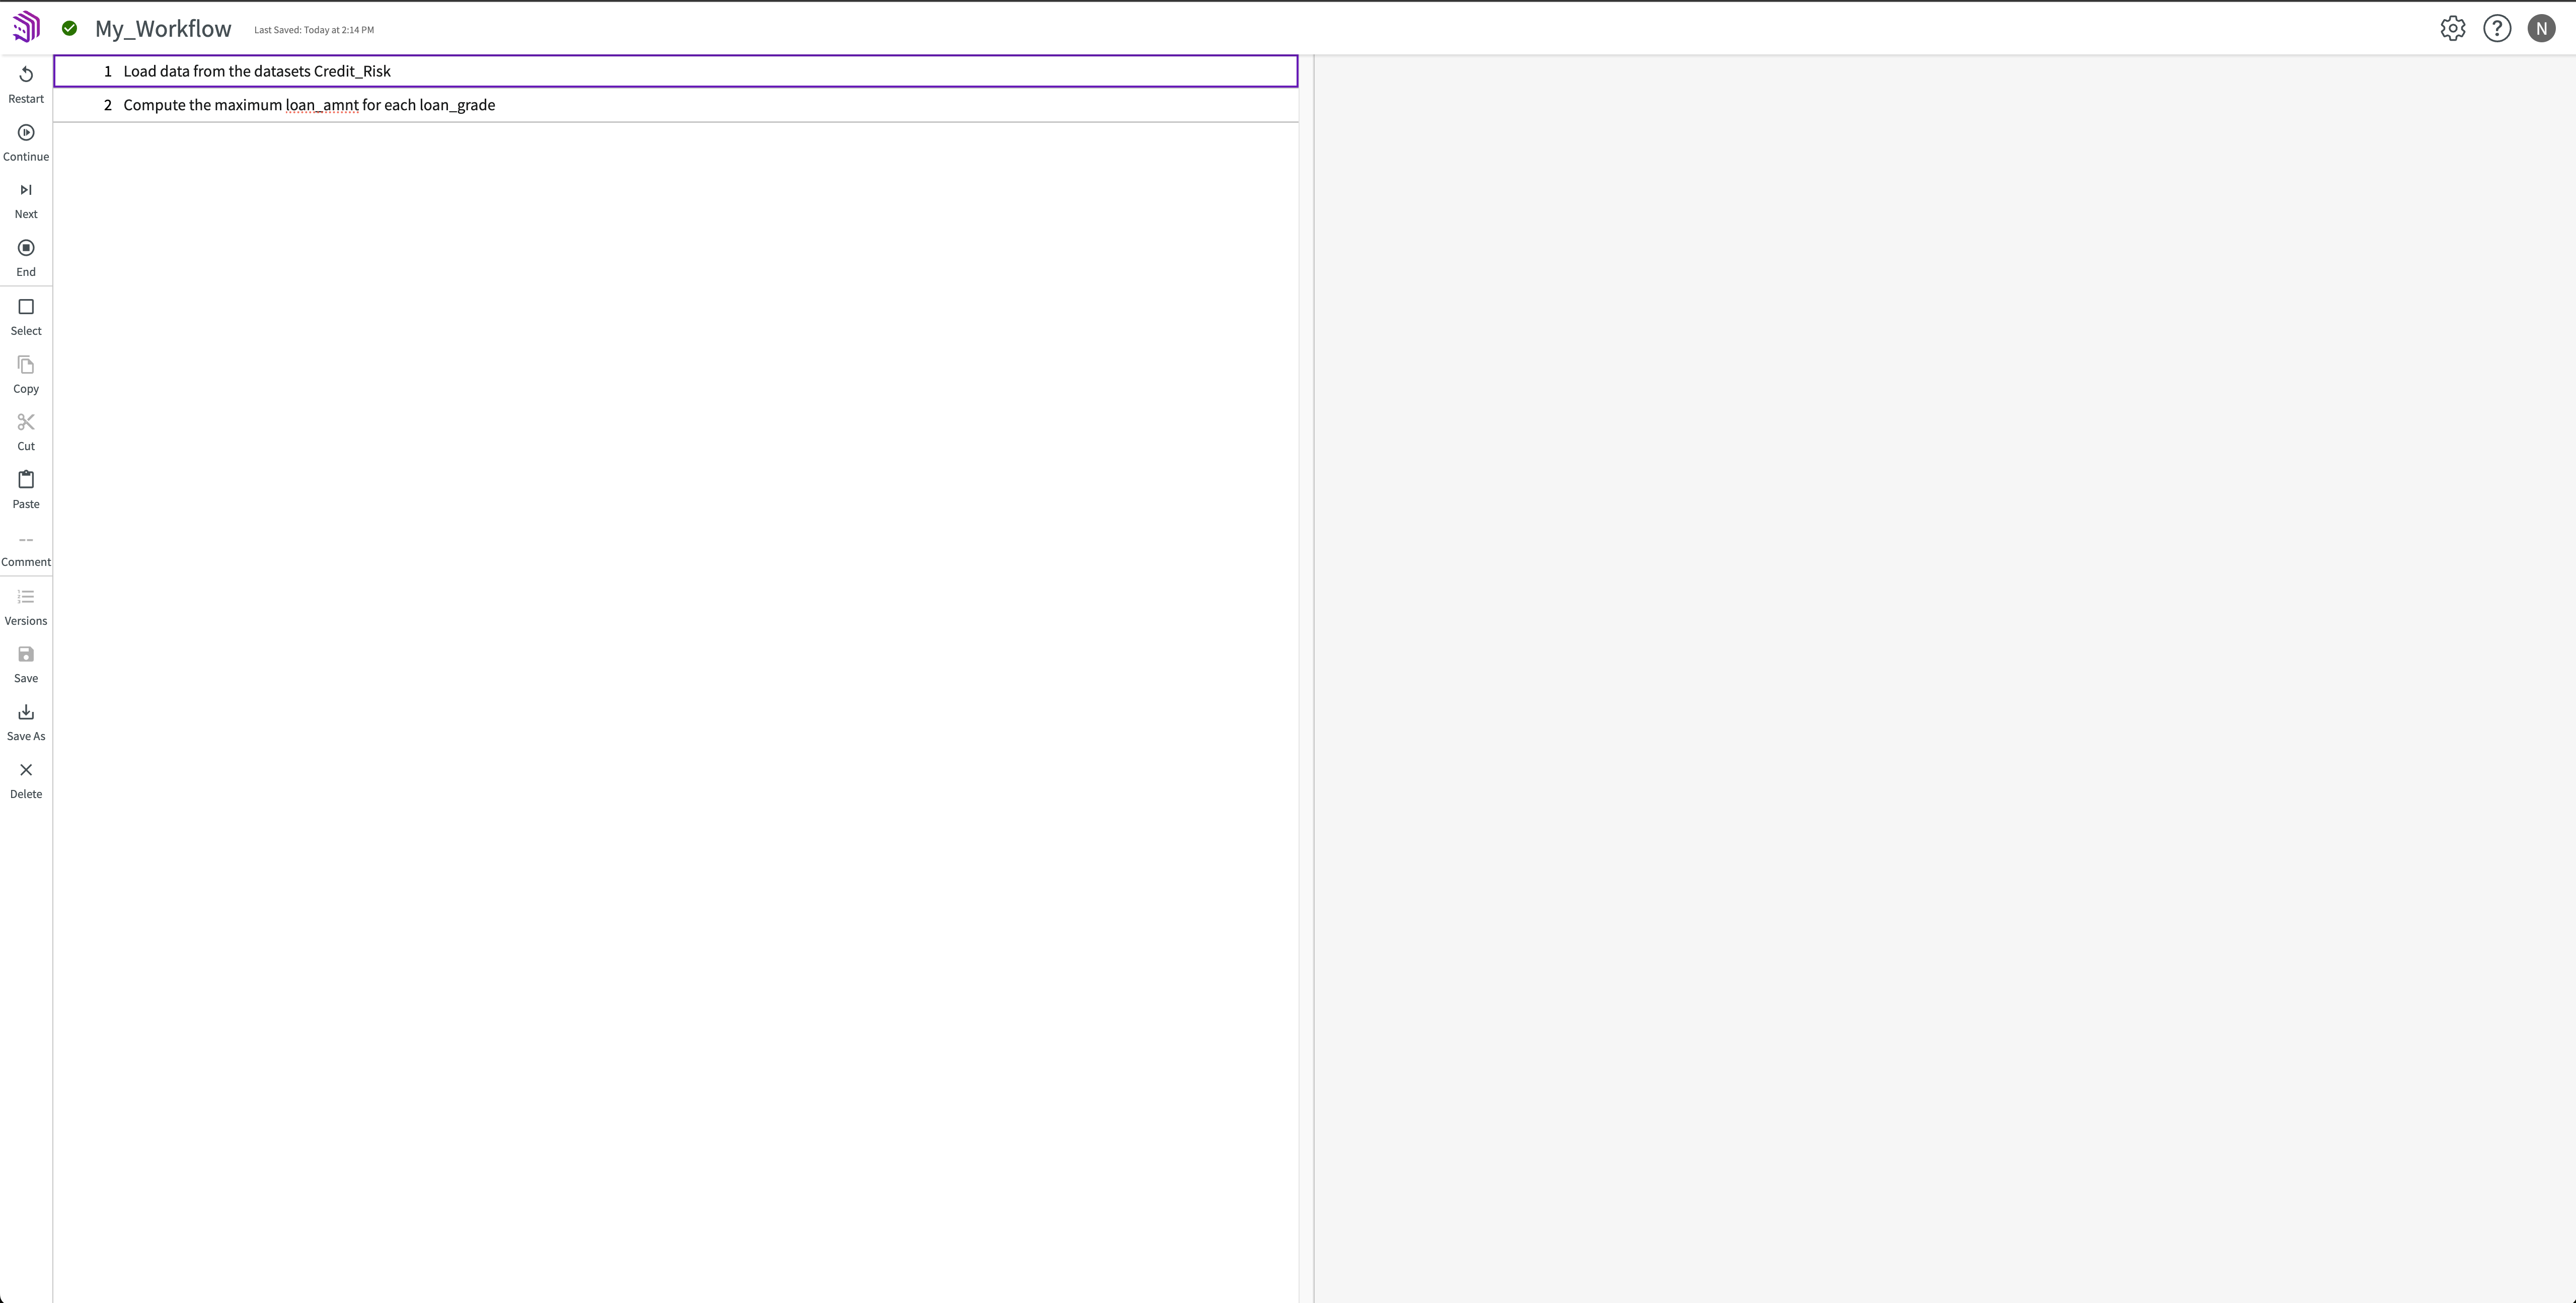
The Editor allows you to edit and test your workflows.
Open the Editor
From the homepage, navigate to either My Work or Workflows, then:
- Select the workflow to edit.
- Click Edit Workflow. Optionally, you can also use the right-click menu.

This opens the workflow in the Editor.
Edit Steps
With the Editor open, you can use the steps on the left side to make changes to your workflow. You can:
- Change pieces of individual steps, such as values or column names.
- Add or remove steps.
- Manage workflow versions.
- Save the workflow as a new workflow with a different name.
Add or Remove Steps
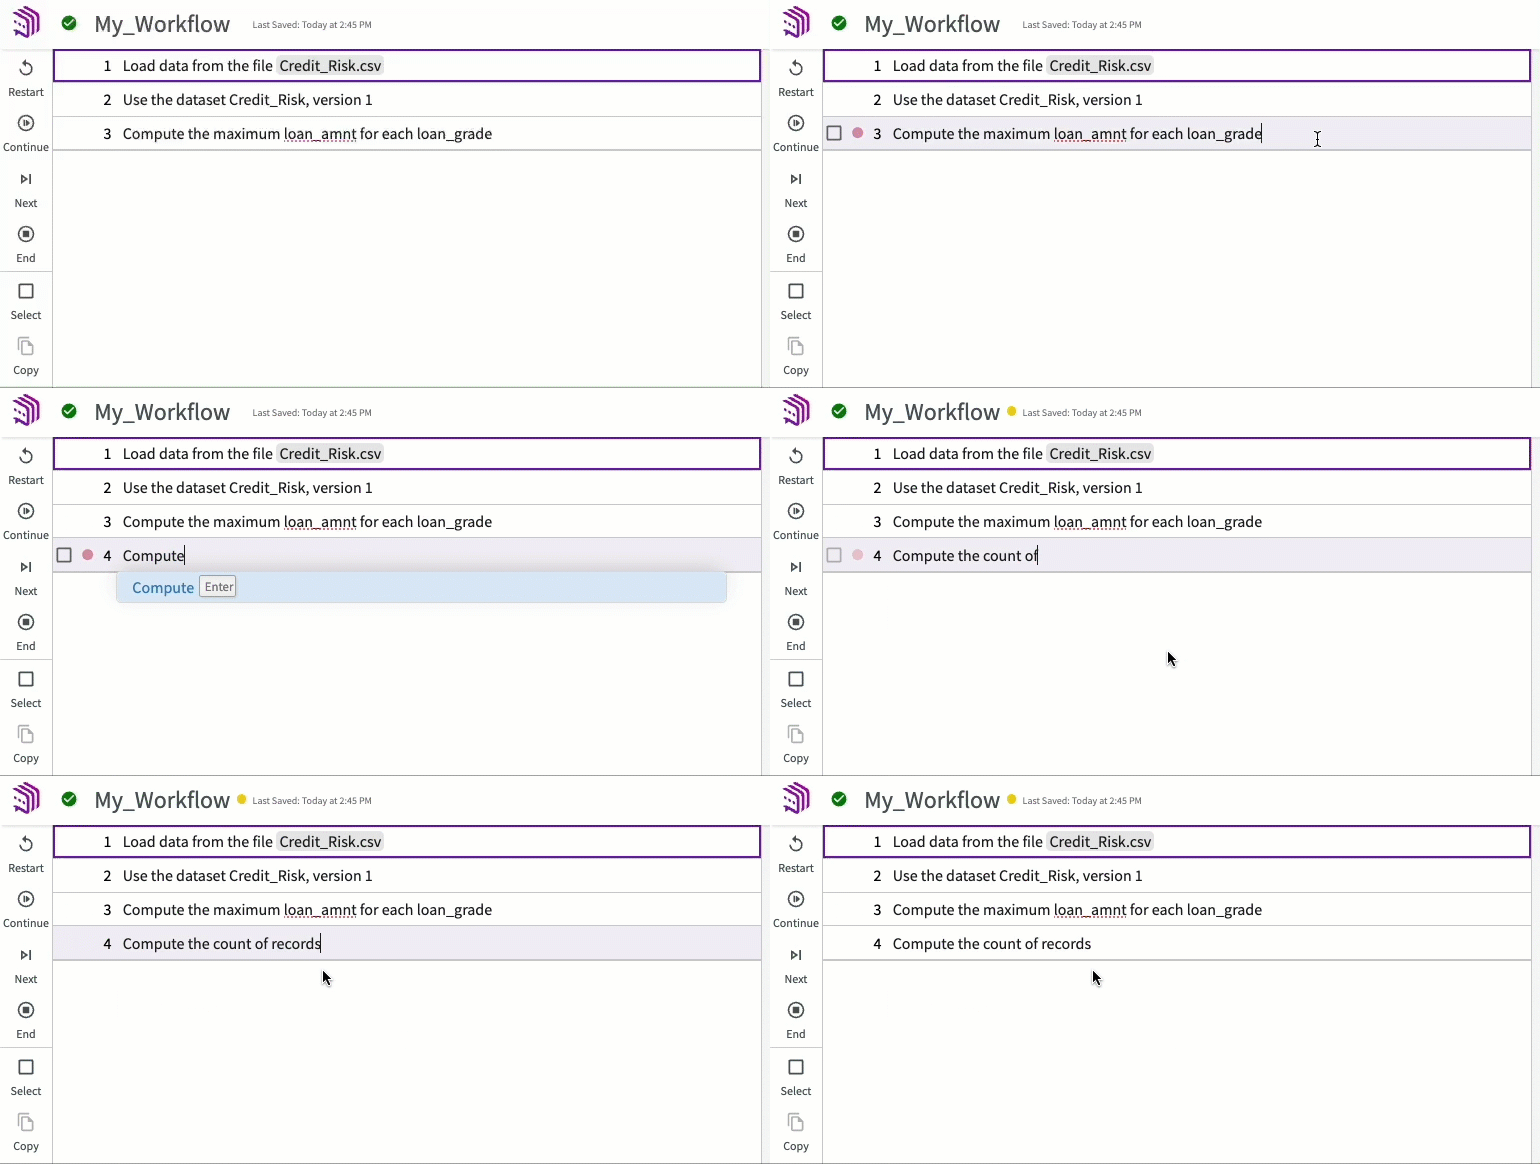
To add a step:
- Create an empty line. Click anywhere in a line and press Enter to create a new line below. Click at the front of a line and press Enter to create a new line above.
- Enter the the new step you'd like to add to your workflow.
To delete a step:
- Use the checkbox to select the lines that you'd like to delete.
- Click the Cut button.
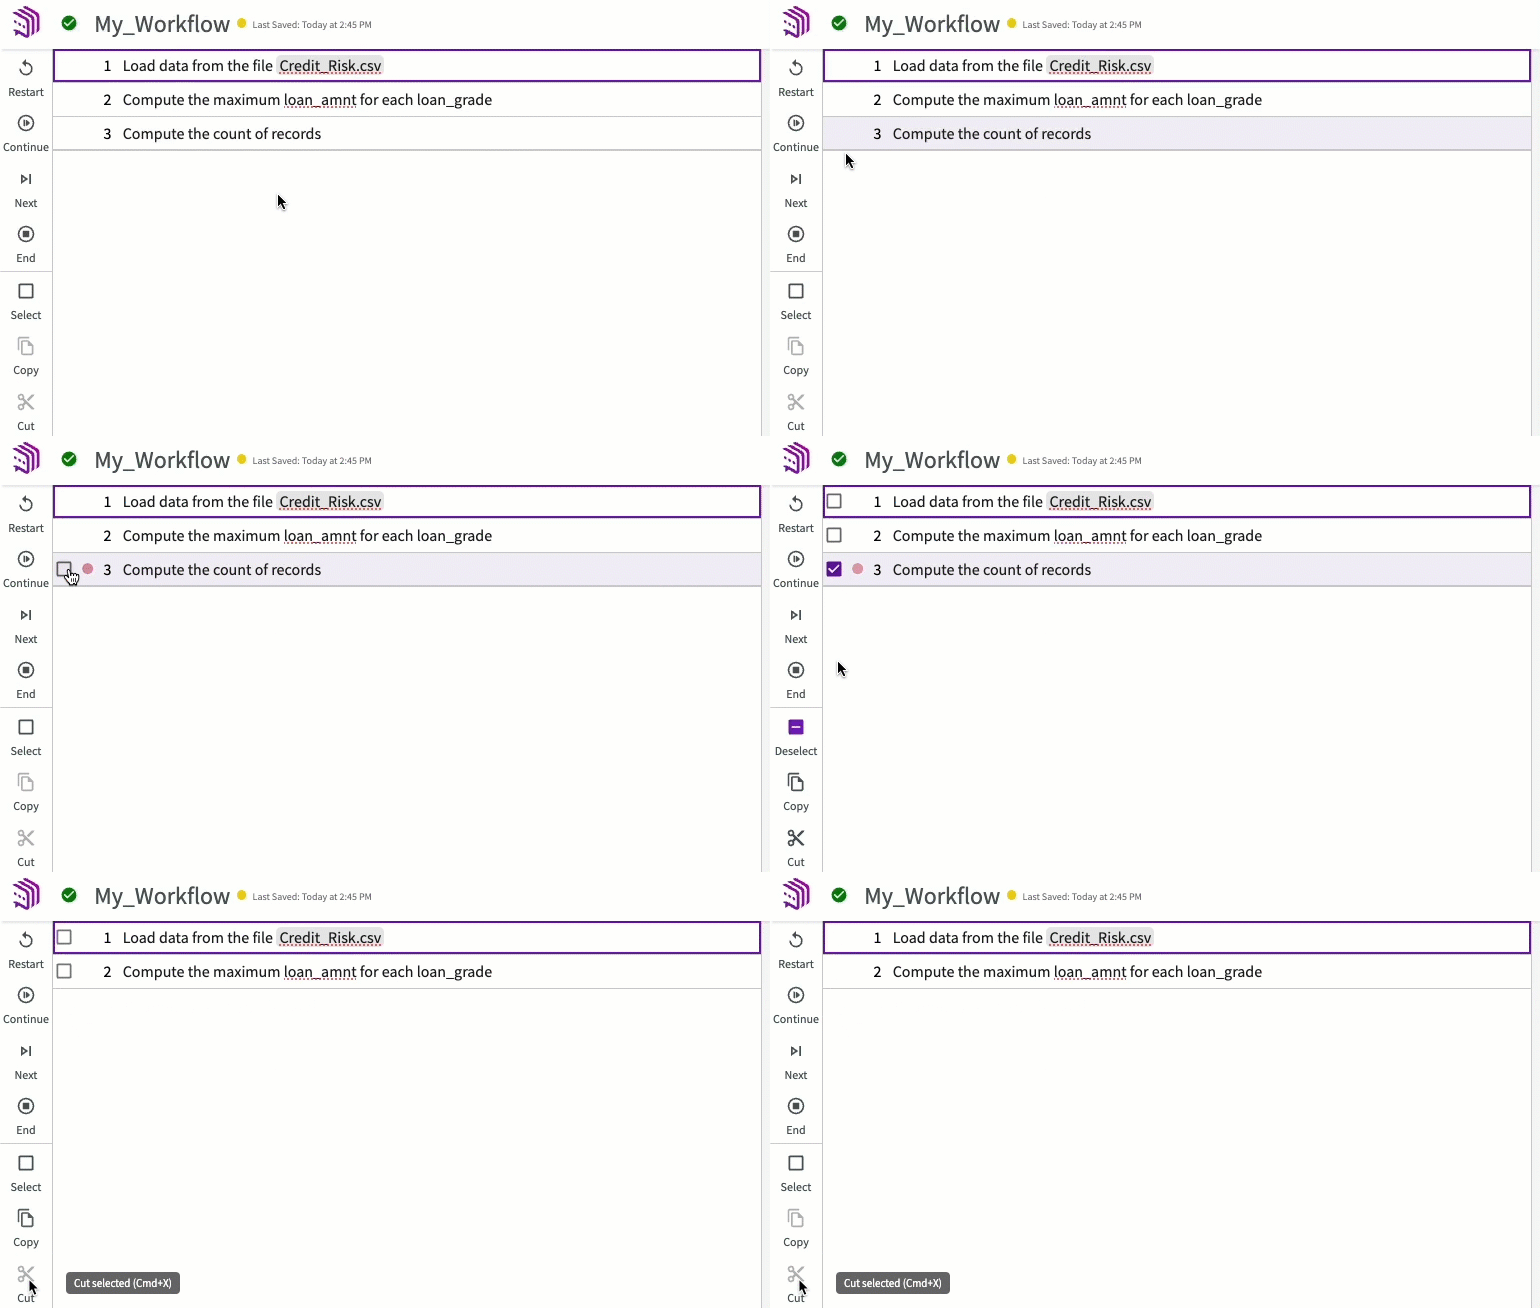
You can also select the entire step and delete it.
Add Comments
To add a comment:
- Create an empty line. Click anywhere in a line and press Enter to create a new line below. Click at the front of a line and press Enter to create a new line above.
- Enter a comment.
- Select the checkbox on your new line and click Comment in the sidebar. Or, prepend your comment with "--".
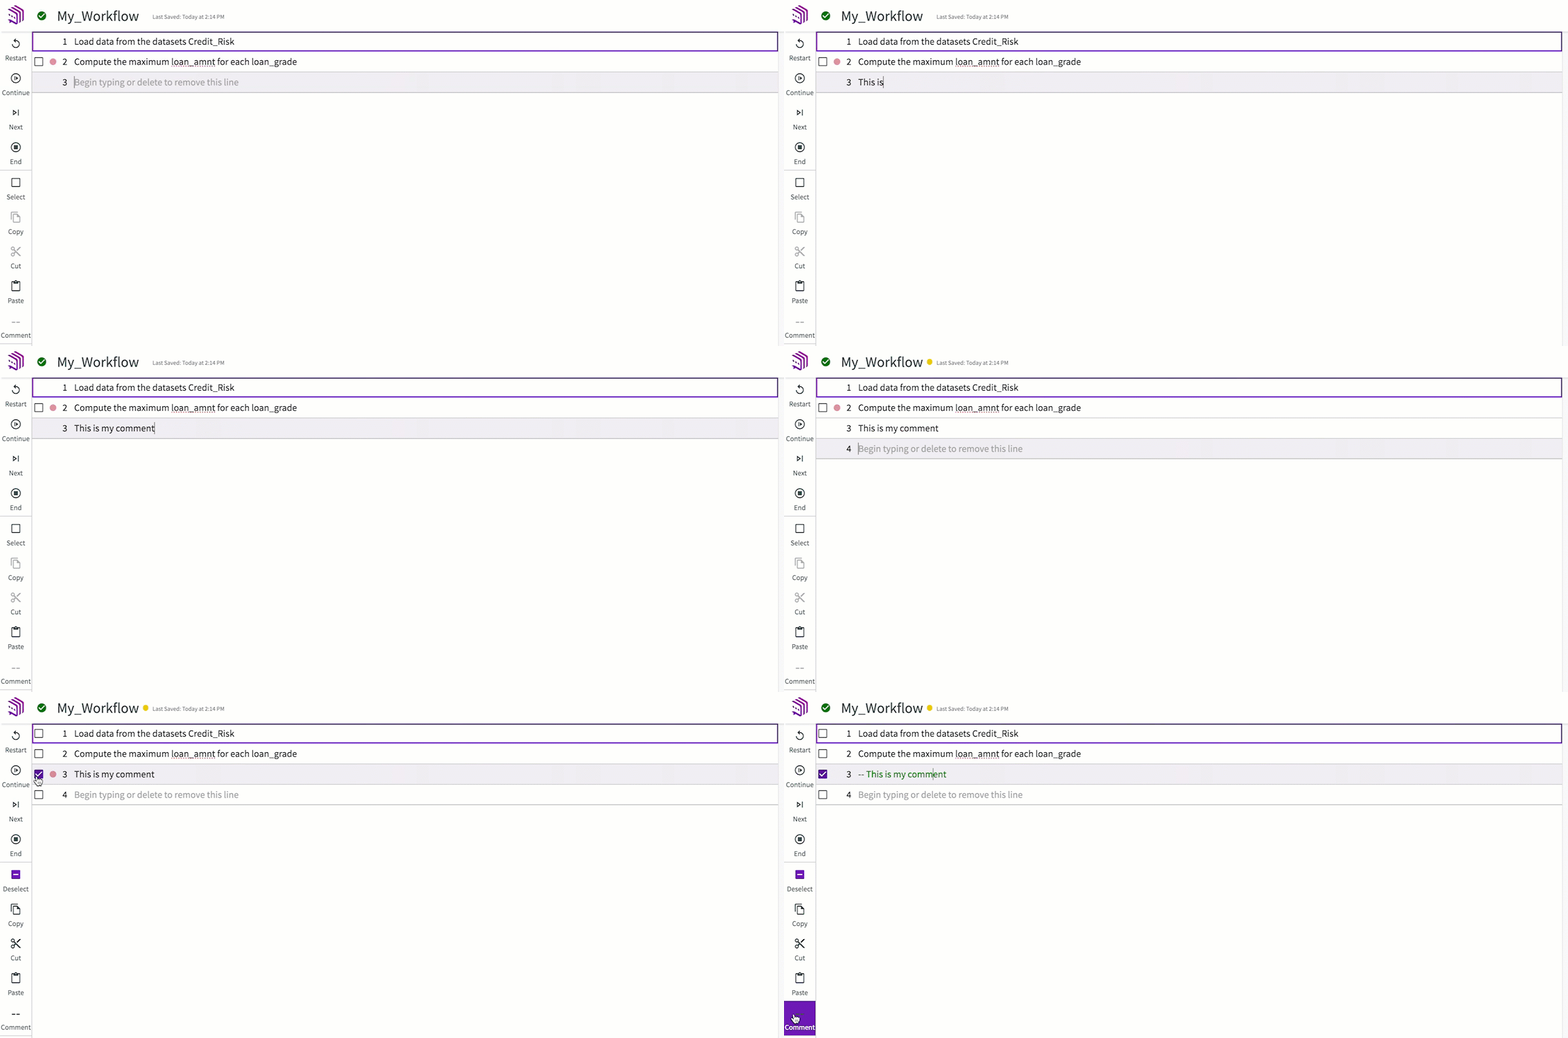
Comments are colored green.
Undo or Redo Edits
- MacOS
- Windows
To undo an edit, click Command + Z.
To redo an edit, click Shift + Command + Z.
To undo an edit, click Ctrl + Z.
To redo an edit, click Shift + Ctrl + Z.
Changes cannot be undone or redone if the step that the change targets has been replayed.
Verify Edited Workflows
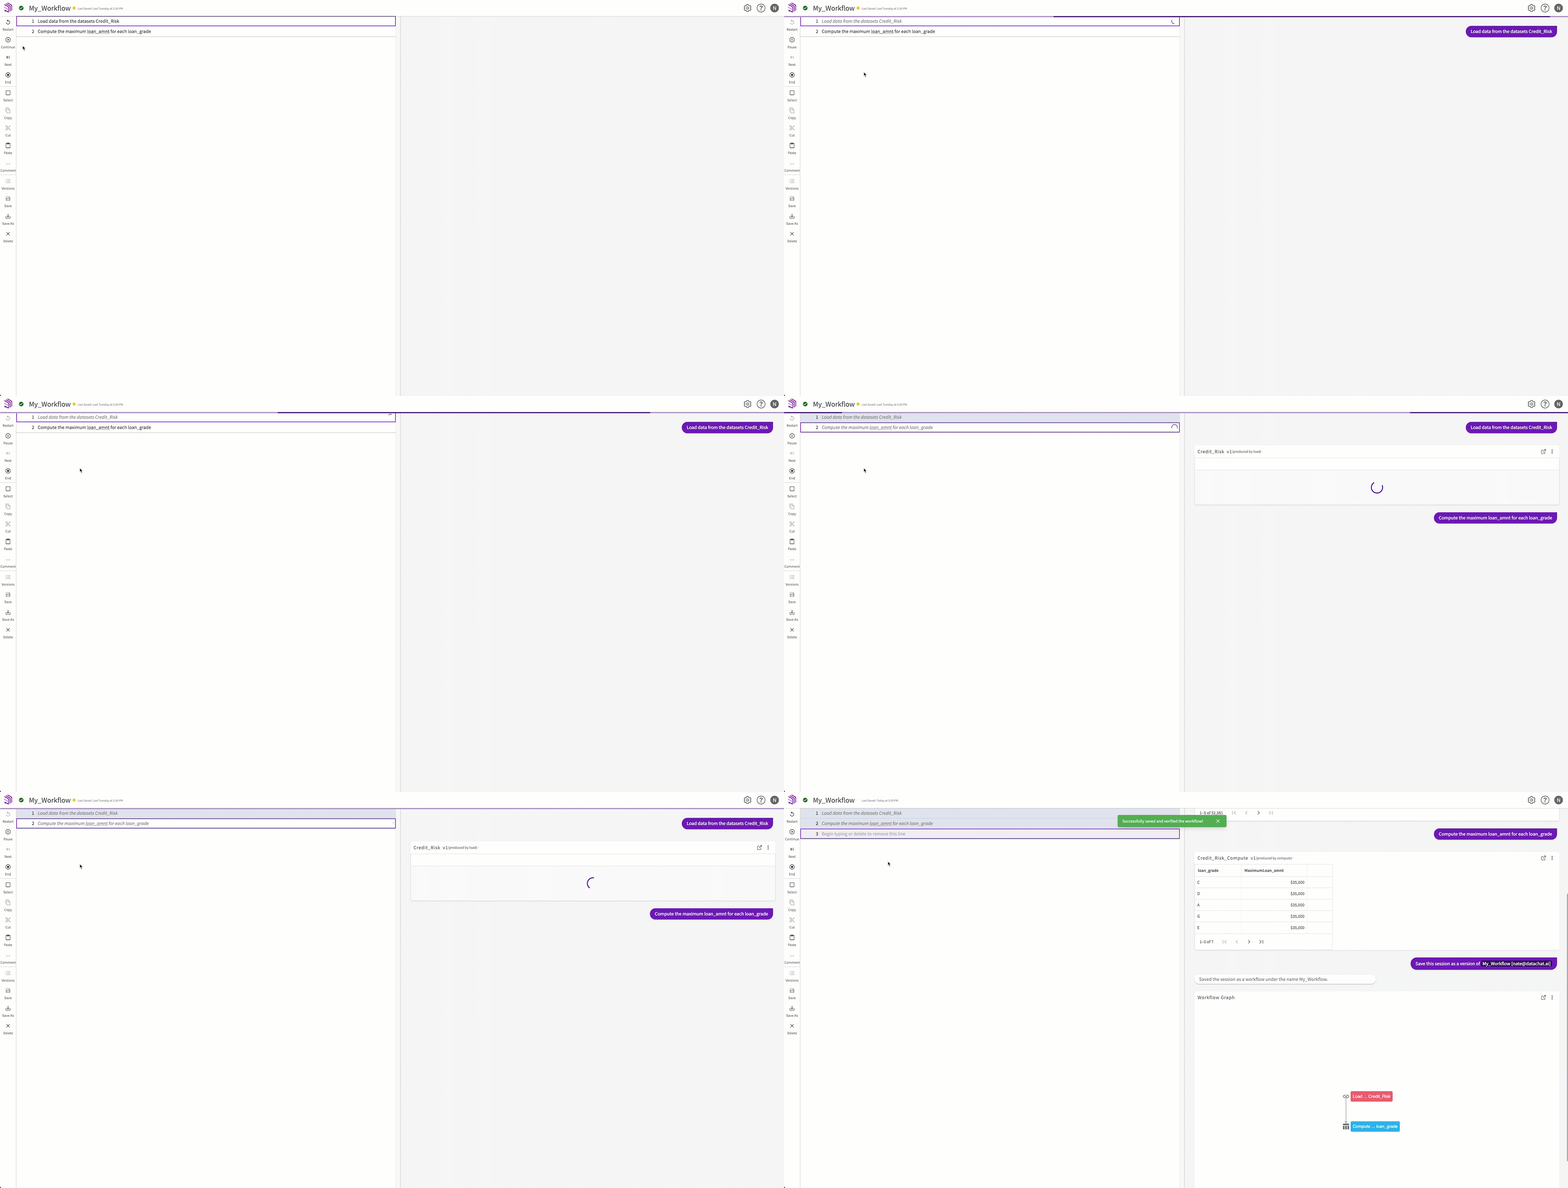
When you've finished making changes, click Restart to verify the workflow.
If a workflow is verified, a green check appears to the left of the workflow name. If you edit a verified workflow, the workflow changes to unverified, and the green check changes to a red icon.
If no errors are encountered, the workflow is automatically verified and saved.
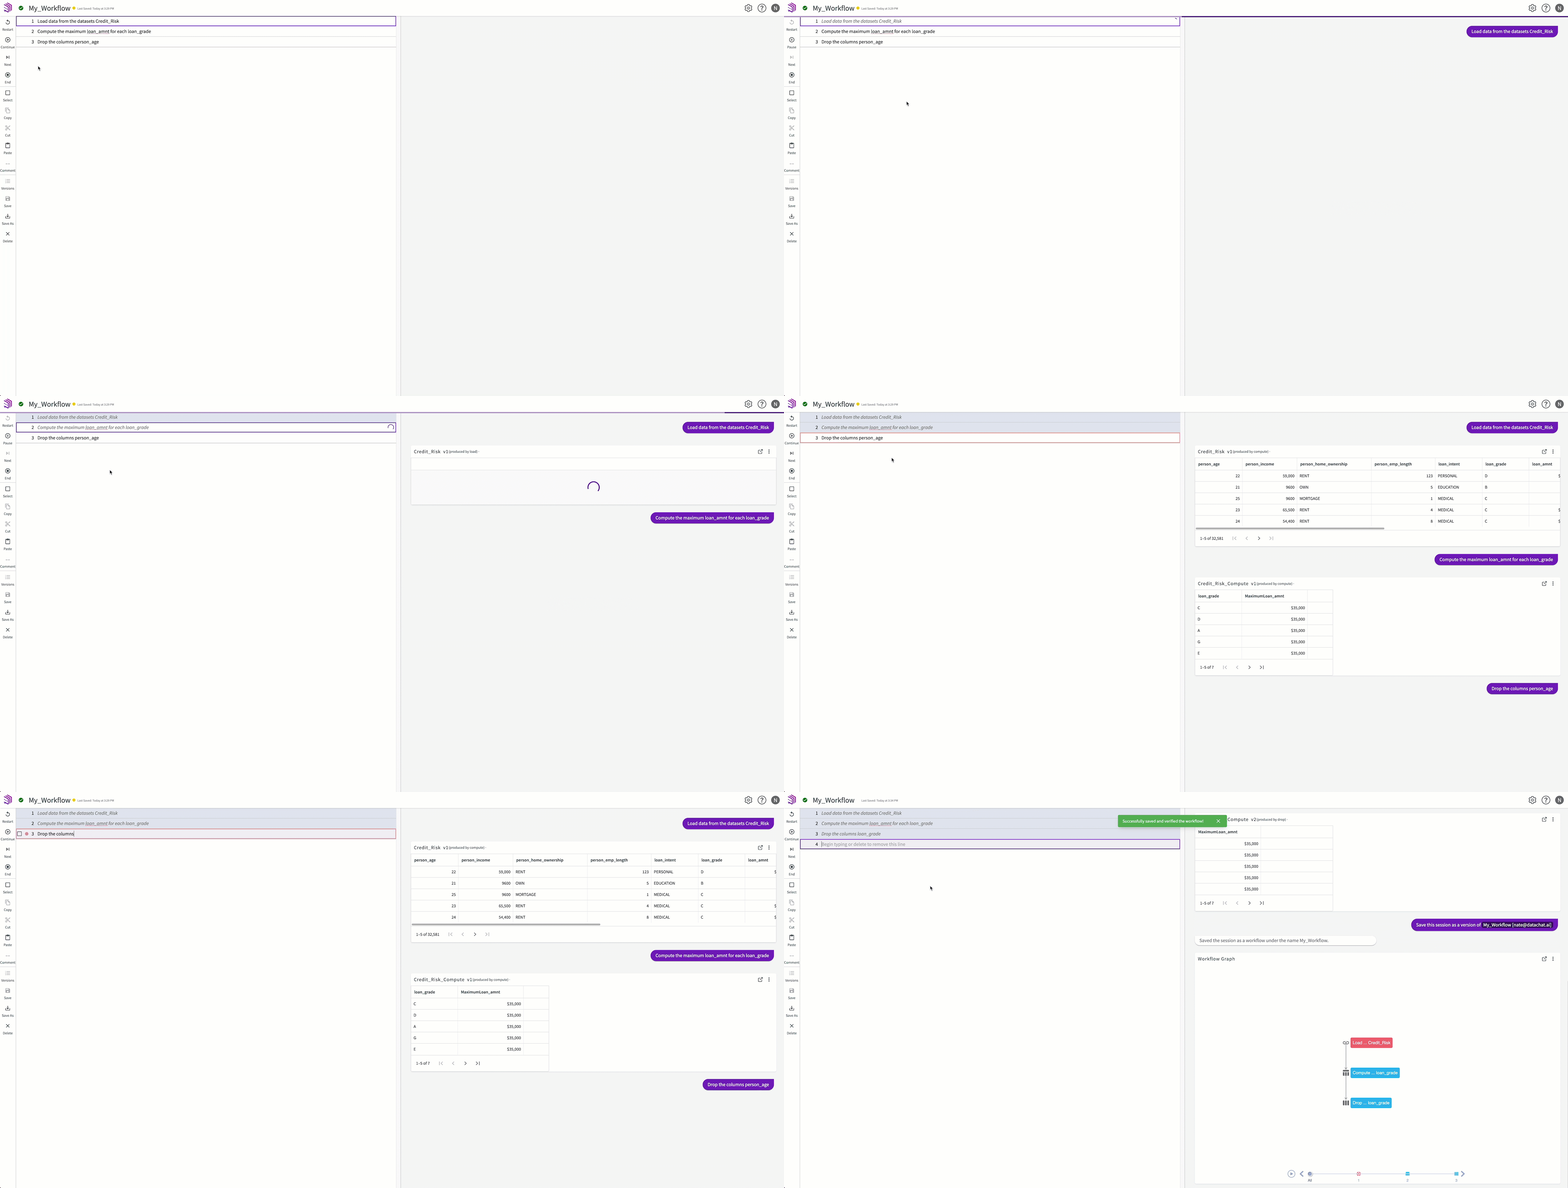
If one of the edits introduces an error, the replay will stop and highlight in red the line that contains an error. Edit the workflow and click Restart or Continue.
Workflows that haven't been verified in the Editor before (such as older workflows) are marked as unverified when they're next opened in the Editor.
Manage Workflow Versions
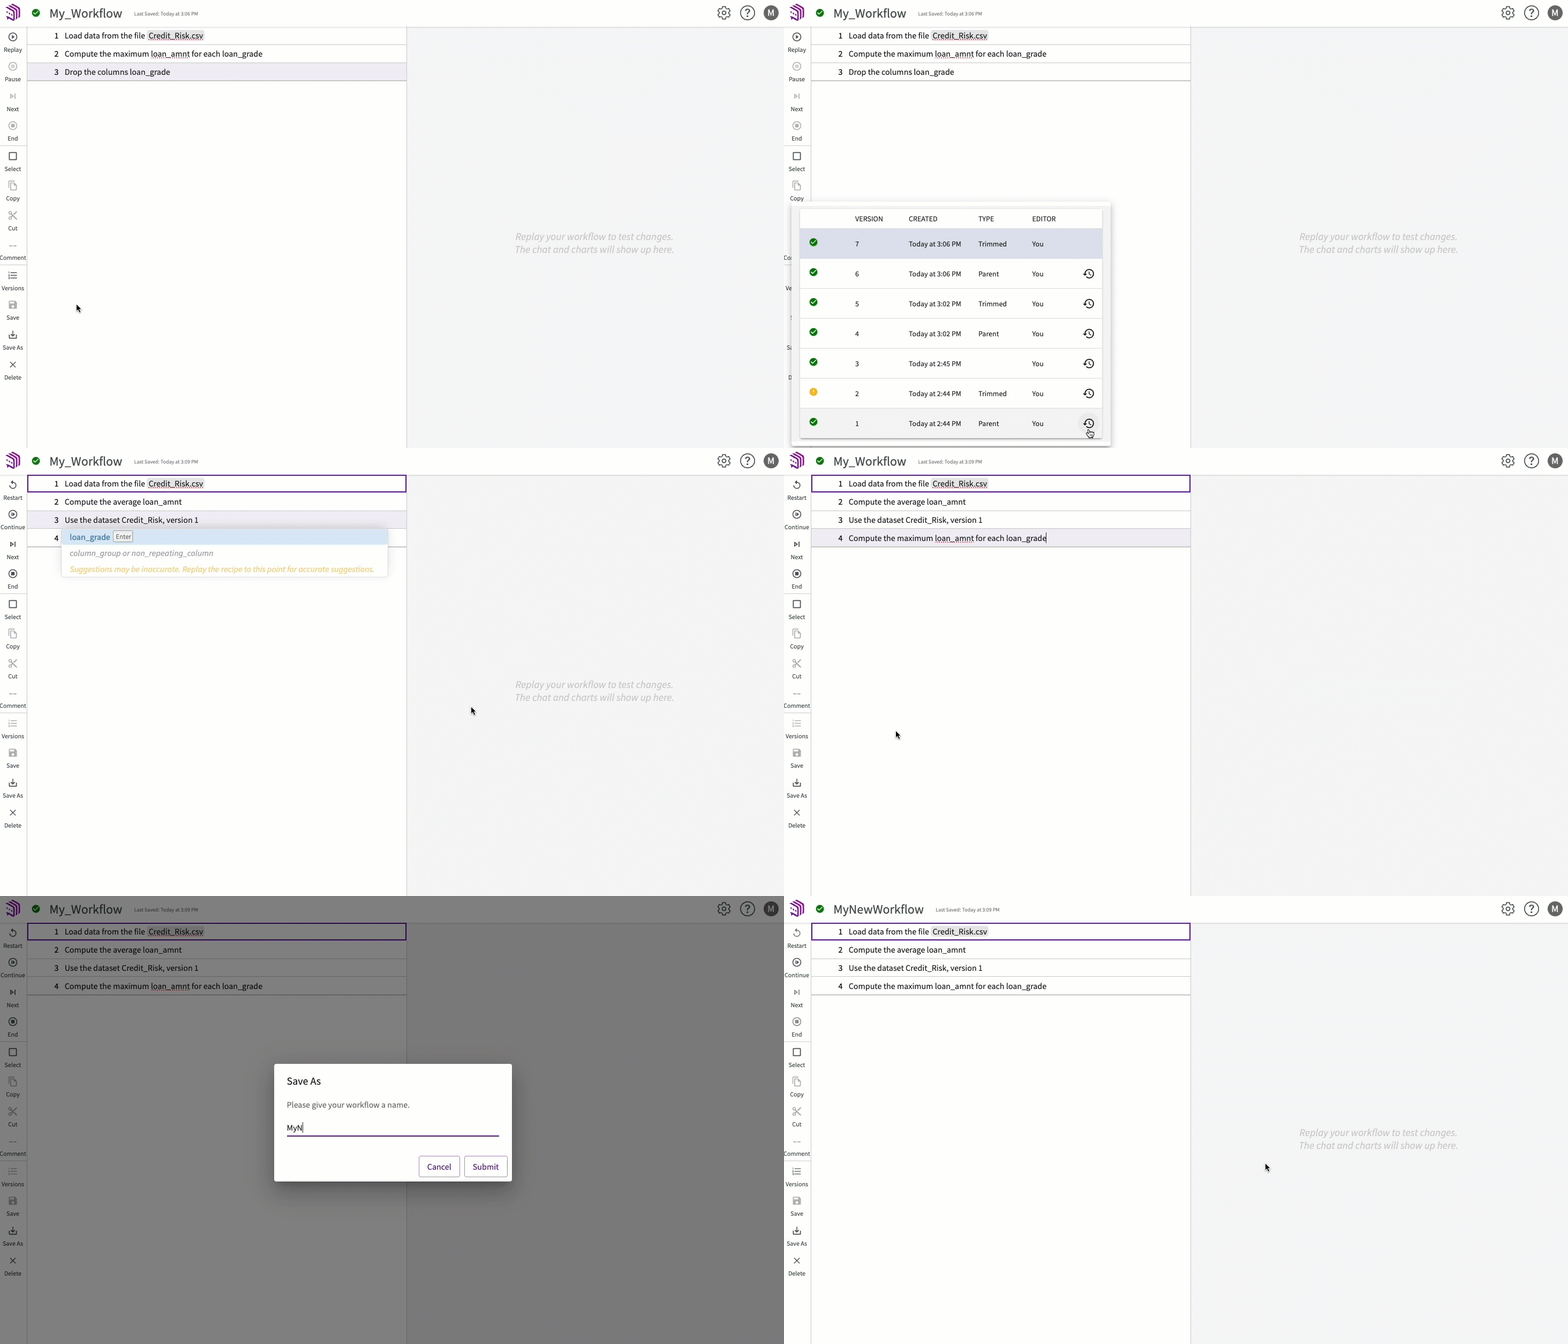
When you save a workflow with the same name as an existing workflow, or make a change and save it, a new version of that workflow is created. To review previous versions or revert back to a previous version in the Editor:
- Click Versions to view each version of the workflow.
- Hover the row of the version you'd like to revert and click Restore as latest version of the workflow.
- Optionally, you can instead click the row for the version you want to review or revert to. The contents of that version appear in the the Editor.
- Make the desired edits or reversions to the selected version.
- Click Restore to make this version the most recent version, or click Save As to save this version as a new workflow. Give your new workflow a name, then click Submit.
Share, Delete, or Rename a Workflow
To share, delete, or rename a workflow, see DataChat Objects
From the homepage, navigate to either My Work or Workflows to view your saved workflows.
Replay a Workflow
Replaying a workflow allows you to rerun analysis as needed. For example, if you plan to receive a new version of your dataset next month, you can upload your new dataset to replace the older one, then replay your workflow to perform the same analysis on your updated data.
After you've saved your workflow, you can replay your workflows directly from the homepage. Navigate to either My Work or Workflows, then double-click the workflow to replay.
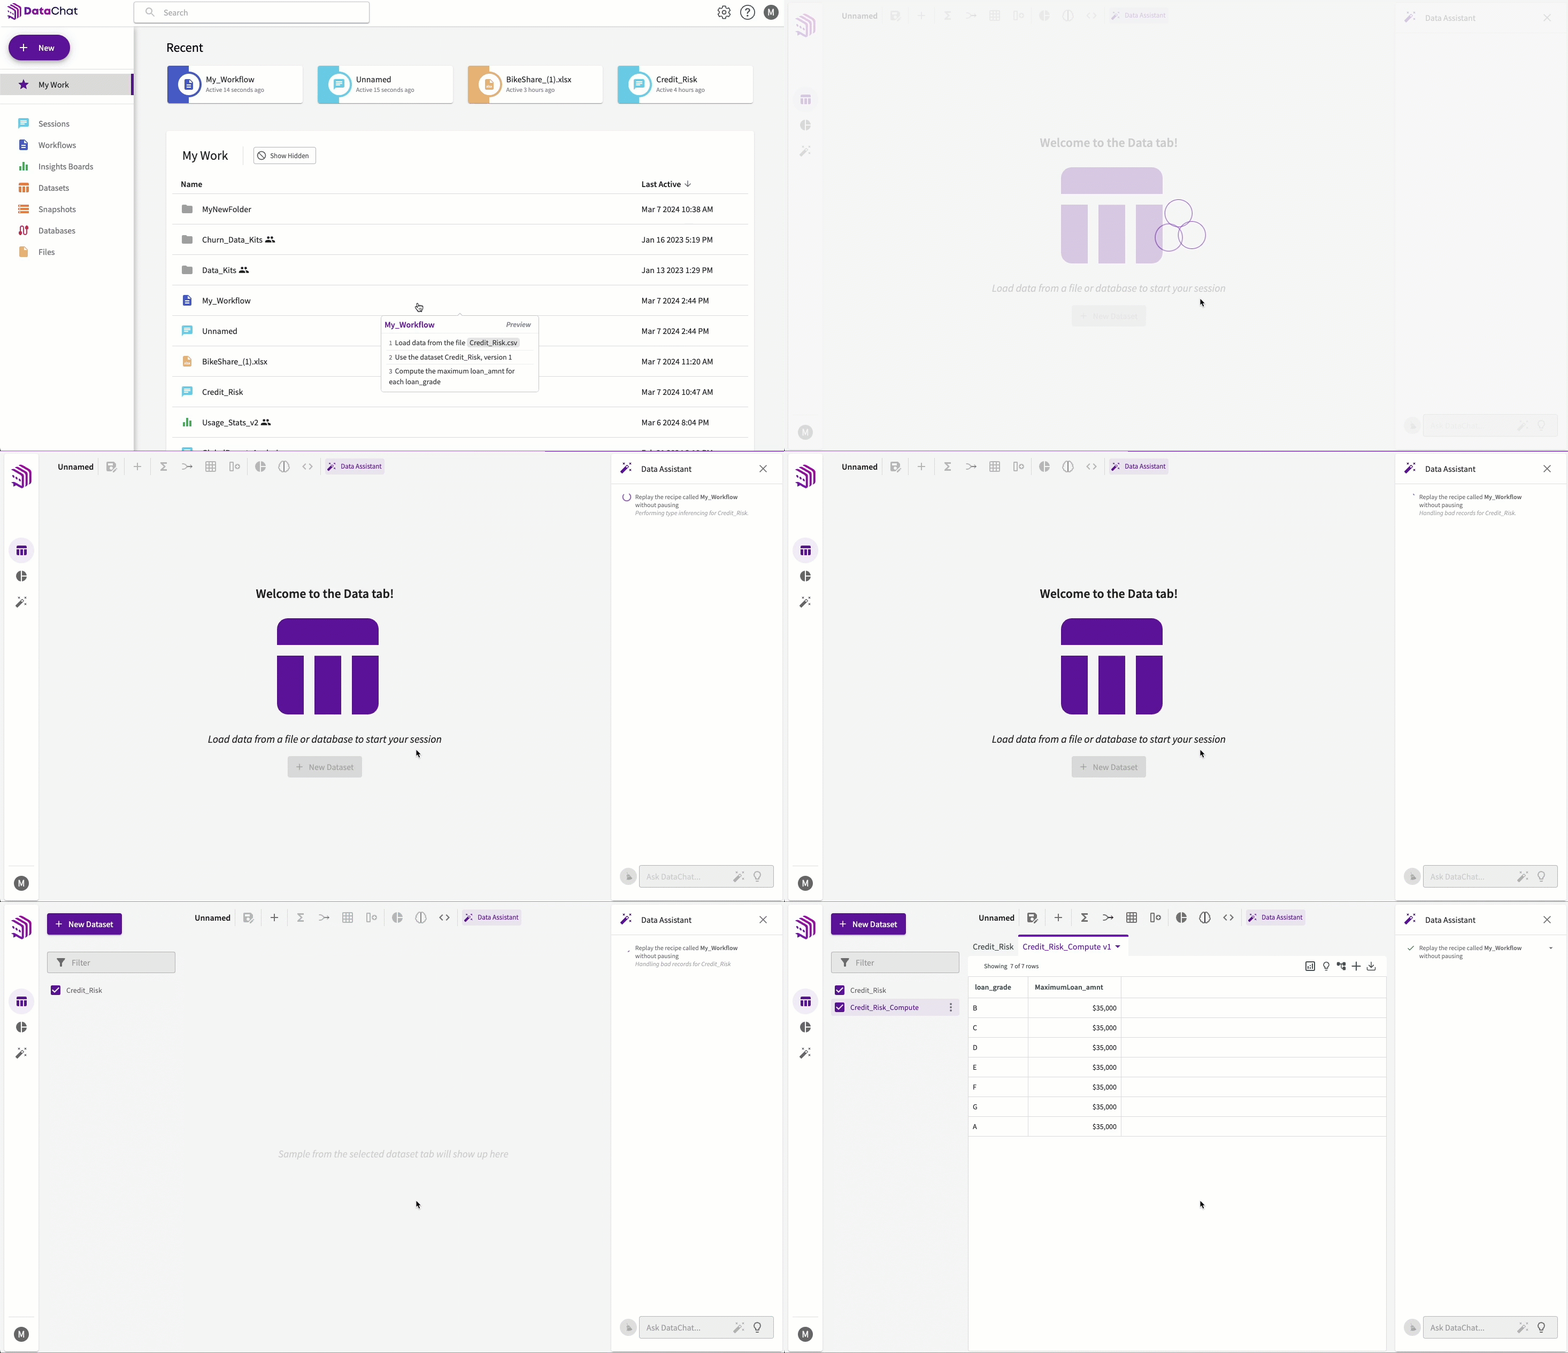
If you'd like a workflow to be automatically saved and verified, it must be replayed as the first step in a session.
Save Active Datasets
Instead of creating a workflow, you can instead choose to only save the active datasets from your session to reuse or resume later.
Saving only the active datasets does not include the charts or models created in your session, only the datasets used to create them.
Multiple Datasets
To save all active datasets in your session:
-
Click Save in the skill menu.
-
Select Active datasets in the folder.
-
Enter a name for the folder.
-
Click Submit.

This saves your active datasets in a folder under My Work on the homepage. These datasets can then be refreshed and edited or loaded into a new session.
Singular Datasets
Alternatively, you can save a single active dataset:
-
Click Save As in the header of the dataset you'd like to save.
-
Enter a name for the dataset.
-
Click Save As.
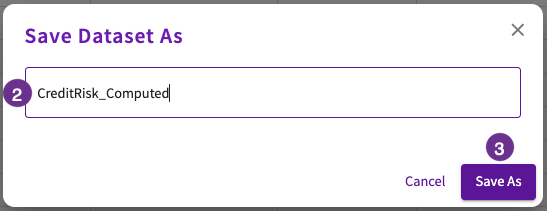
This saves the active dataset under its new name on the homepage. This dataset can then be refreshed and edited or loaded into a new session.