Enable Database OAuth
DataChat enables connections to databases via OAuth for BigQuery and Snowflake.
BigQuery
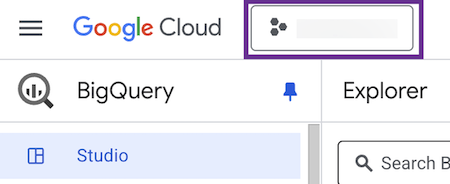
Step 1: Find Your BigQuery Project Name
To obtain your BigQuery project name, go to Google Cloud Console and locate your project name shown at the top next to the Google Cloud logo:
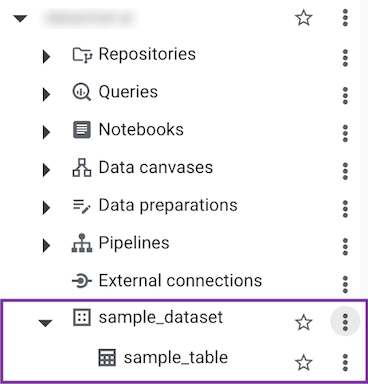
Step 2: Find Your Dataset Name
From the Explorer tab in BigQuery, expand your project. From the list of datasets, find the exact name (case-sensitive) of the dataset you'd like to use.
Step 3: Enter Required Information in DataChat
Once you’ve gathered your project name and dataset name, in DataChat:
-
Navigate to the Database Browser.
-
Enter your credentials as follows:
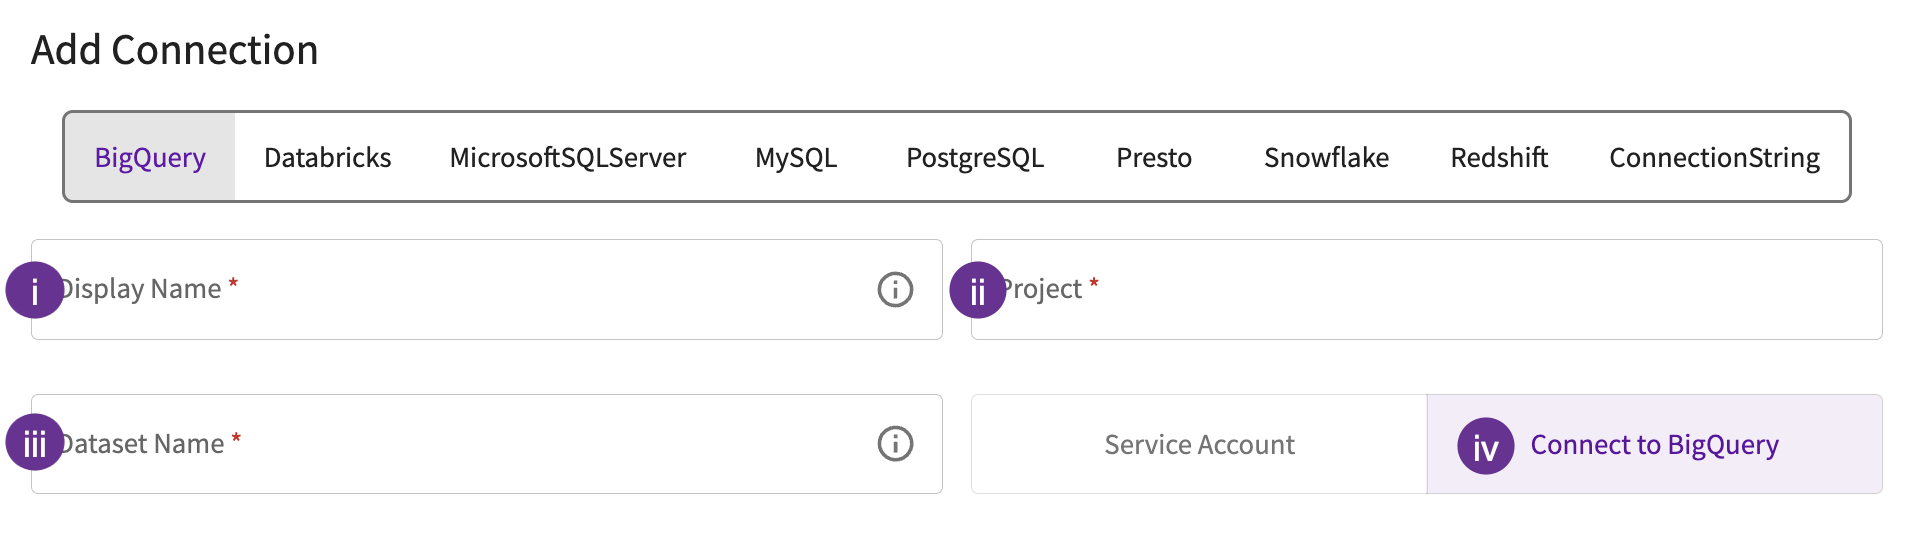
- Give the database a display name. This is how you'll reference the database across DataChat.
- Enter your project name.
- Enter the dataset name.
- Click Connect to BigQuery.
-
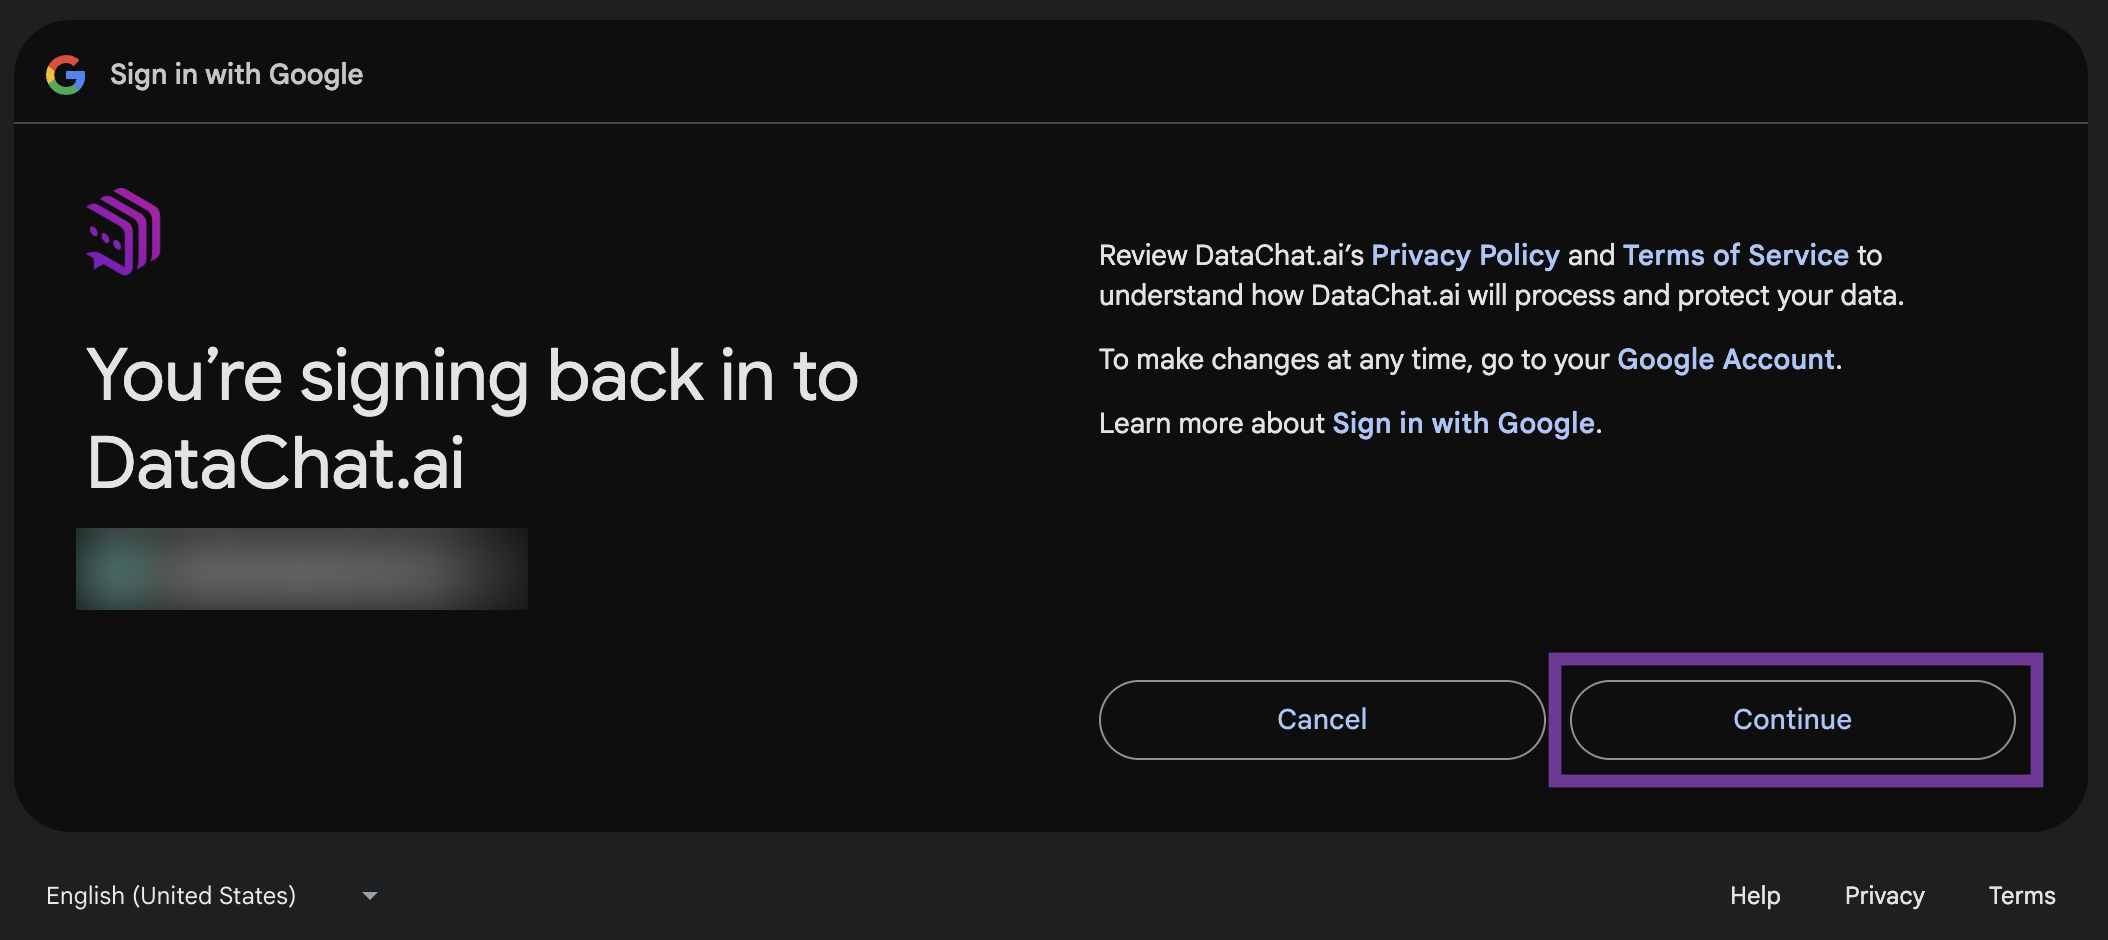
Choose your Google account.
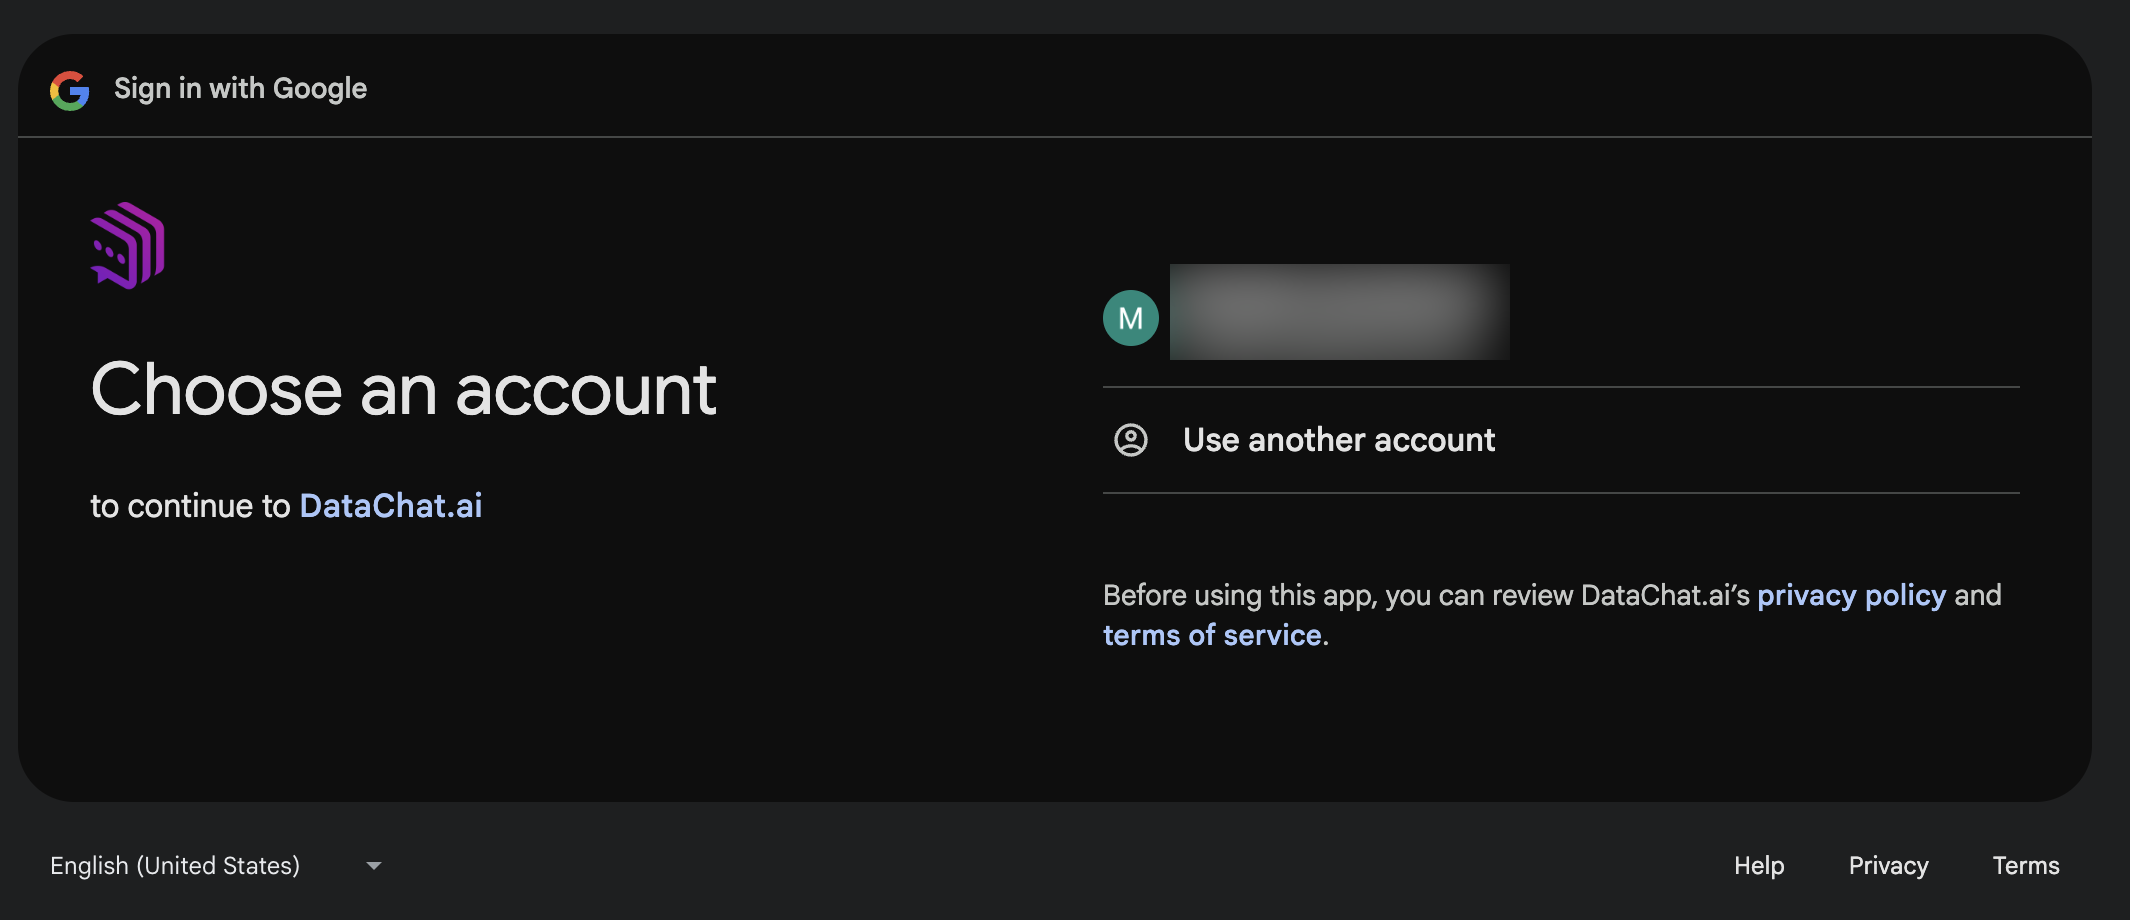
-
Review the consent screen and click Continue to sign back in to DataChat.
Snowflake
Step 1: Create Snowflake OAuth Integration
Run the following SQL script in your Snowflake database to create the OAuth integration:
CREATE SECURITY INTEGRATION DATACHAT_OAUTH_INTEGRATION
TYPE = OAUTH
ENABLED = TRUE
OAUTH_CLIENT = CUSTOM
OAUTH_CLIENT_TYPE = 'CONFIDENTIAL'
OAUTH_REDIRECT_URI = 'https://apps.datachat.ai/oauth'
OAUTH_ISSUE_REFRESH_TOKENS = TRUE;
If you're using a privileged Snowflake role, you may need to allow privileged roles to authenticate via OAuth. See Snowflake's documentation for more information.
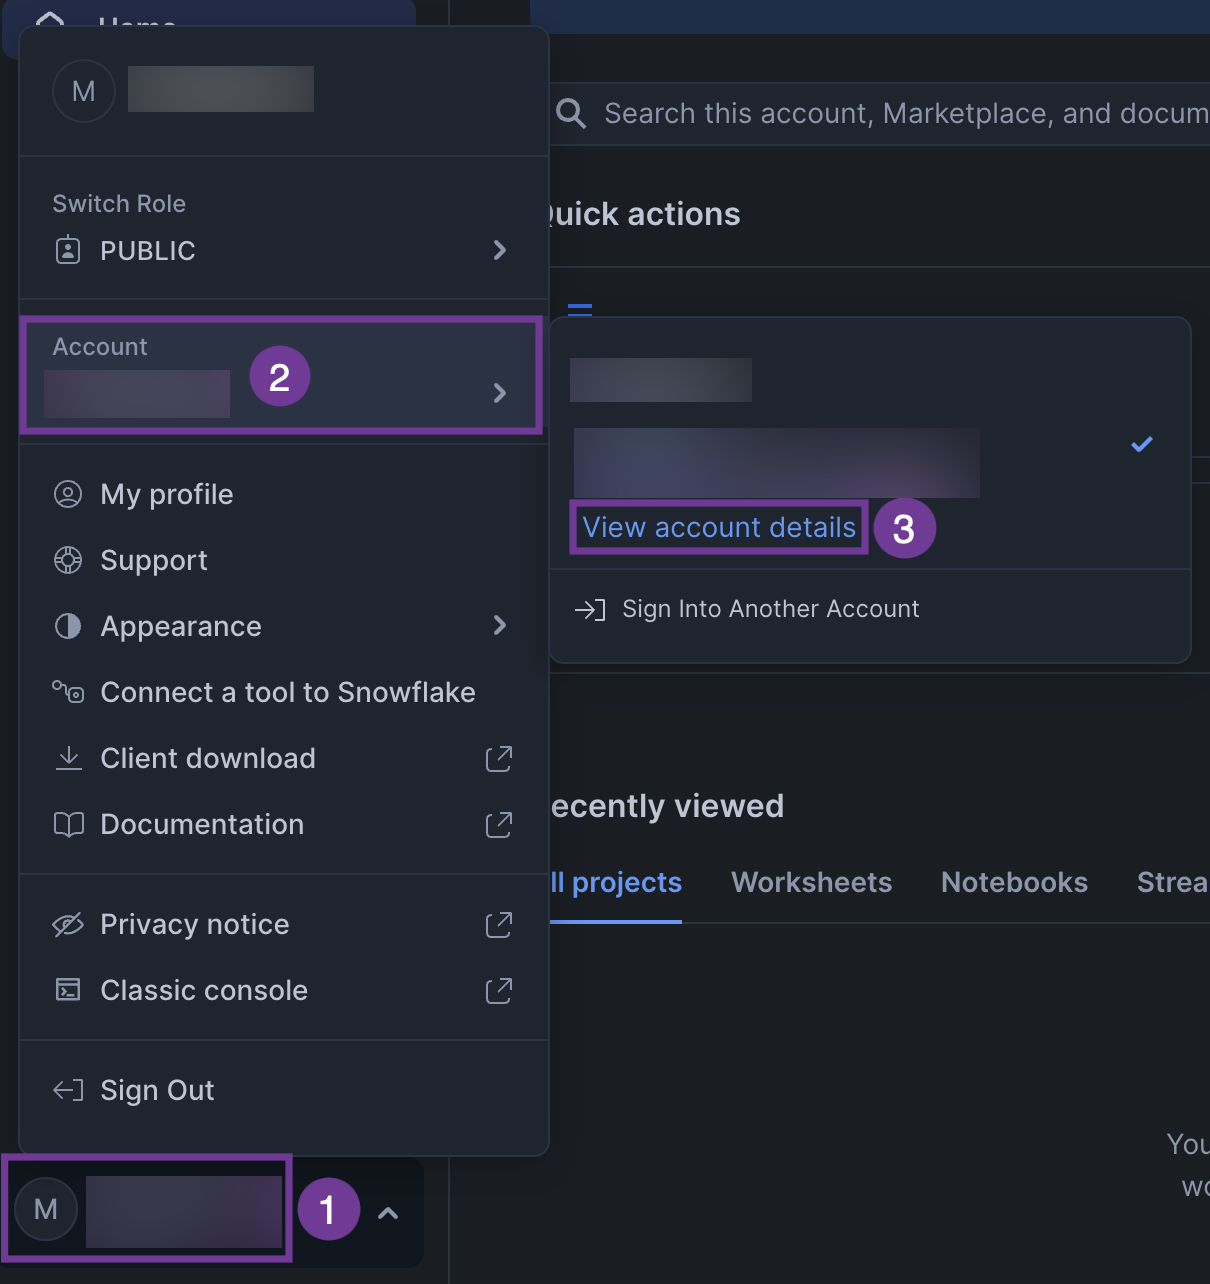
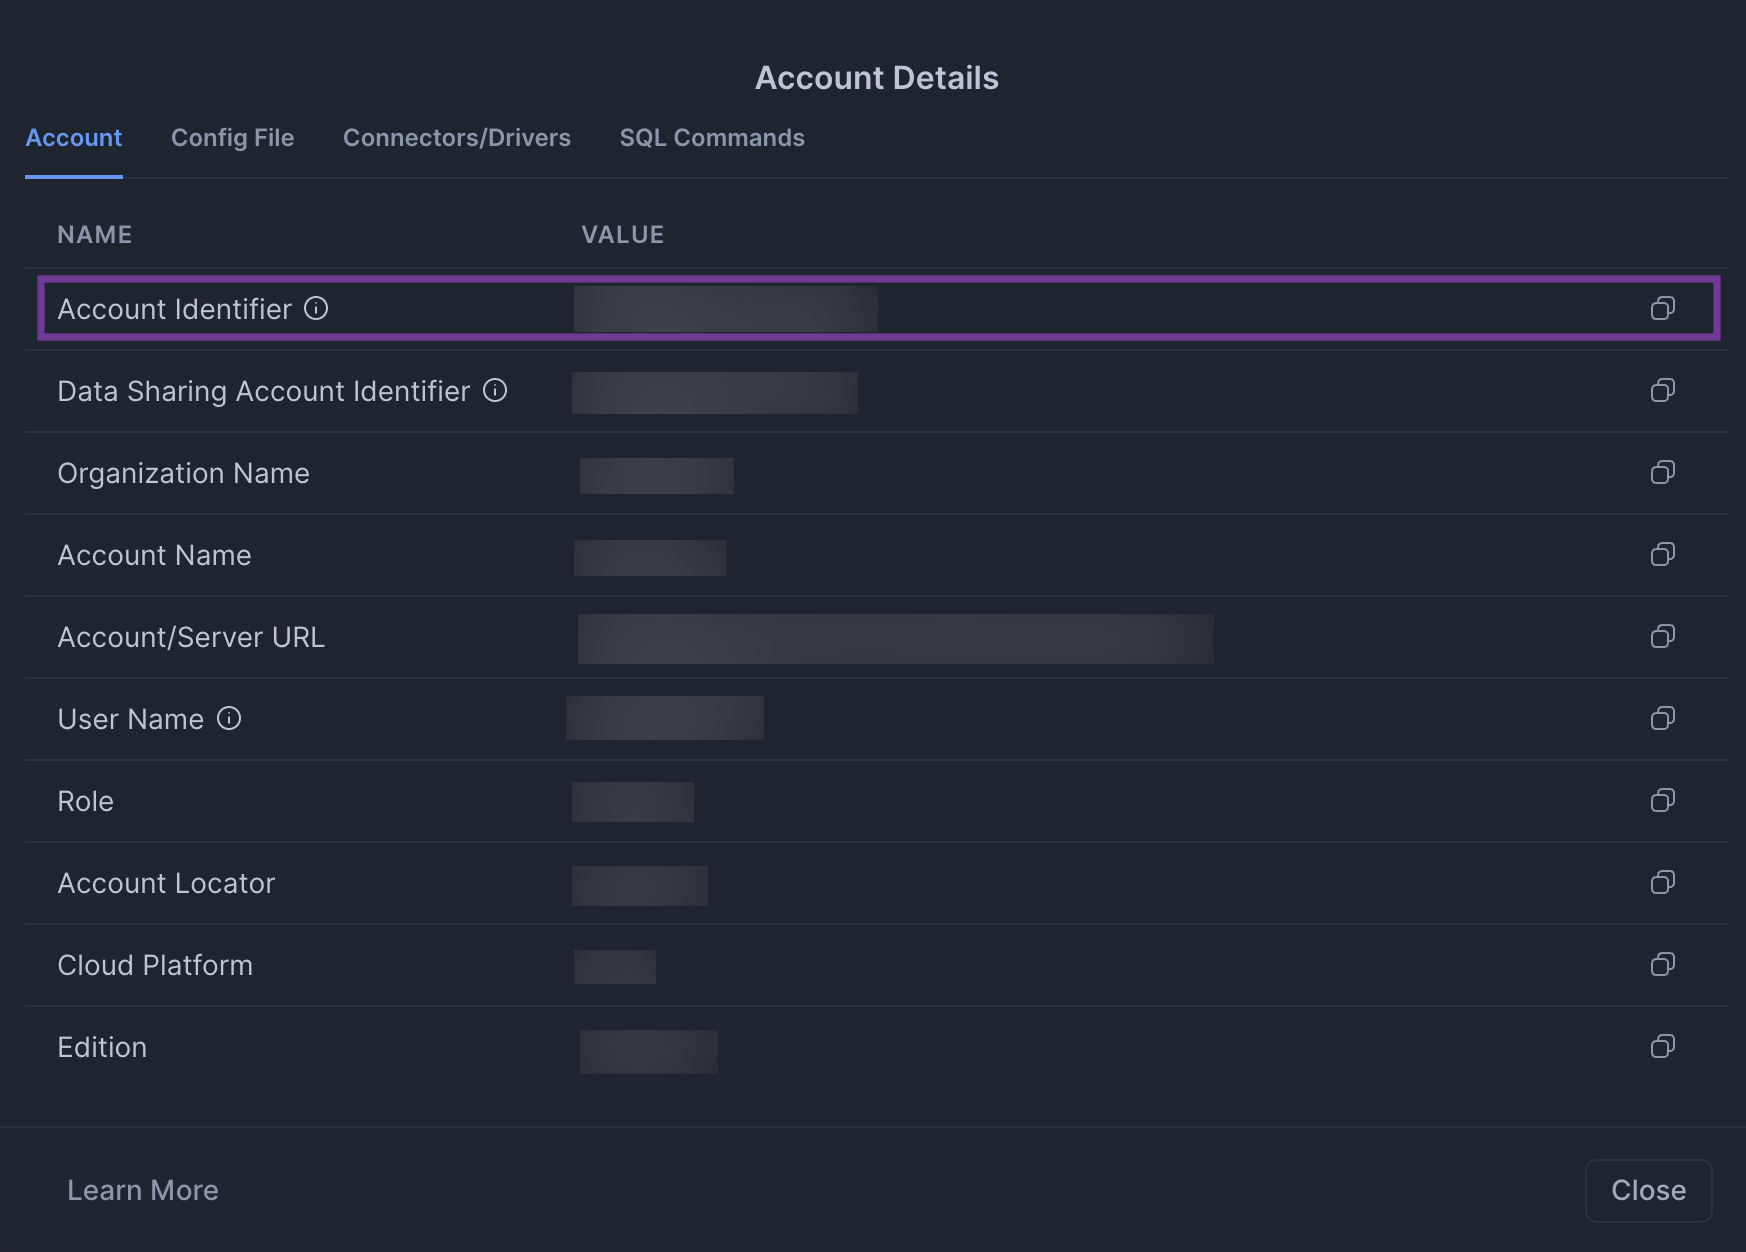
Step 2: Retrieve Your Snowflake Account Identifier
To obtain your account identifier, click your account icon > Account > View account details:
Step 3: Get Client Secret and Client ID
Retrieve the client secret and client ID for the integration by running the following query in Snowflake:
SELECT SYSTEM$SHOW_OAUTH_CLIENT_SECRETS('DATACHAT_OAUTH_INTEGRATION_DEV');
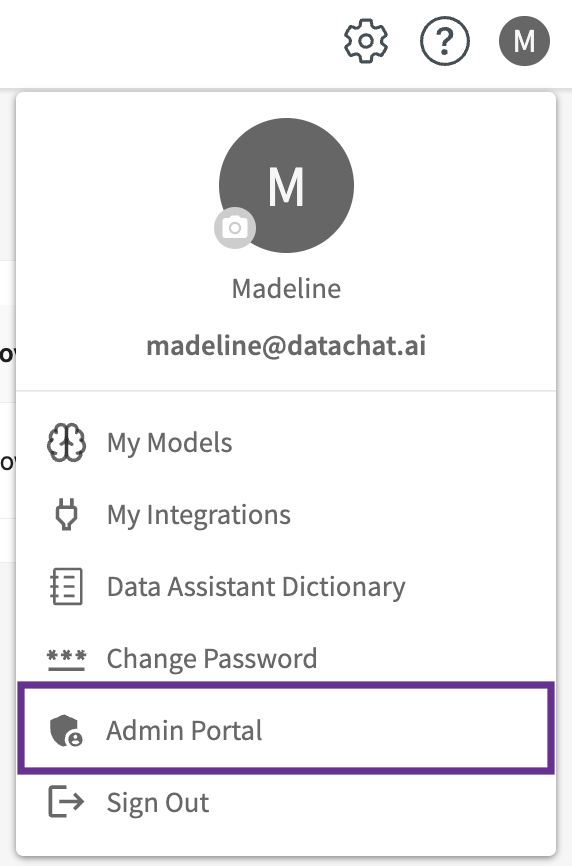
Step 4: Enter Required Information in DataChat
This step requires Admin access in DataChat.
Once you’ve gathered your account name, client ID, and client secret, in DataChat:
-
Navigate to the Admin Portal.
-
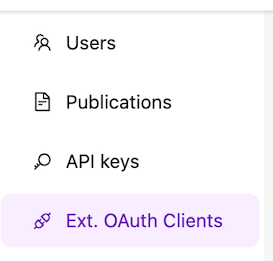
Select Ext. OAuth Clients from the left menu.
-
Click + Add New OAuth Client.

-
Enter your credentials as follows:
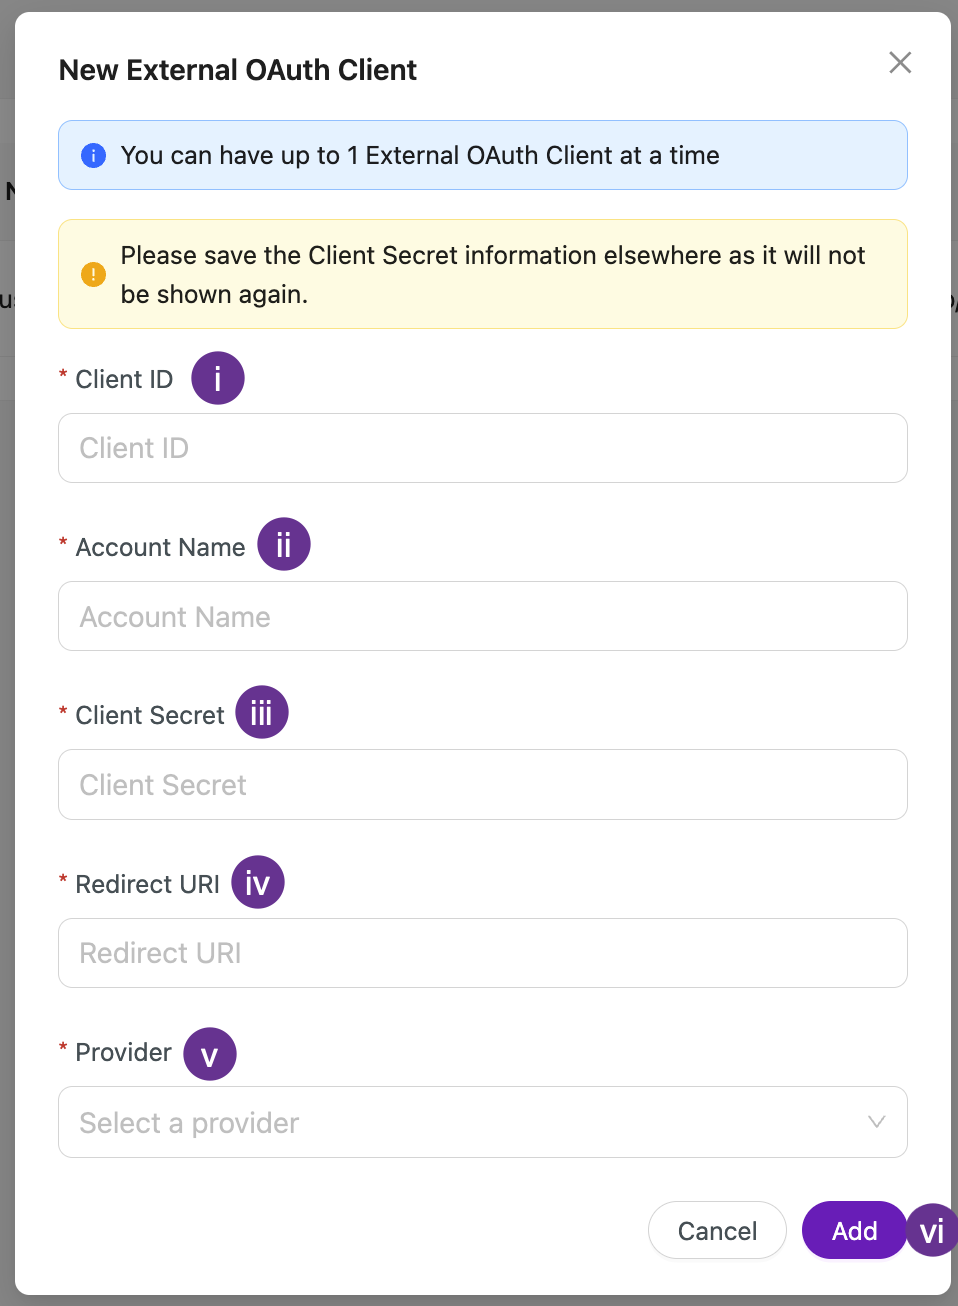
- Enter your client ID from step 3.
- Enter your account identifier from step 2.
- Enter your client secret from step 3.
- Enter your redirect URI (e.g.
https://apps.datachat.ai/oauth). - Select Snowflake as your provider.
- Click Add.